
|
|
|||||||
| Home | Forum | Registrarse | Mini-Banners  |
Miembros | Calendario |
| Toyota Car Club GT Toyota Car Club GT |
|
|

|
 |
 Este thread fue creado hace 5506 días. Lo mas probable es que el tema ya se haya resuelto y no necesite más discusión. Aunque si todavía crees que es necesario agregar un comentario, puedes hacerlo. Este thread fue creado hace 5506 días. Lo mas probable es que el tema ya se haya resuelto y no necesite más discusión. Aunque si todavía crees que es necesario agregar un comentario, puedes hacerlo.
|
|
|
Herramientas |
 26-Jan-2009, 13:55
|
#1 |
|
Senior Member
Fecha de Ingreso: 30-November-2007
Ubicación: Guatemala
tercel,trooper,corollag6
Tiempo: 13s
Mensajes: 172
Feedback Score: 1 reviews
|
conversion a discos traseros en tercel
Buscando en internet me encontre esto, me imagino que hay varios que tienen tercel en el club y les gustaria tener discos en las 4 ruedas, aqui esta como se puede hacer sin necesidad de comprar todo el eje.
Before you start. Put the transmission in 1st gear if it's Manual. Make sure it's in "park" if it's an automatic. I had my Terc on 4 jackstands so I did none of that. Jack up the back of the car using the factory lift points on the rocker panels and then place jack-stands under the rear axle. Now remove the wheel. Let's get down to business. This is the little nasty rusty drum brake setup Toyota equiped our Tercels with. Although completly adequate for the weight of the vehicle, it just looks plain fugly when you've got some sweet alloys on your ride. 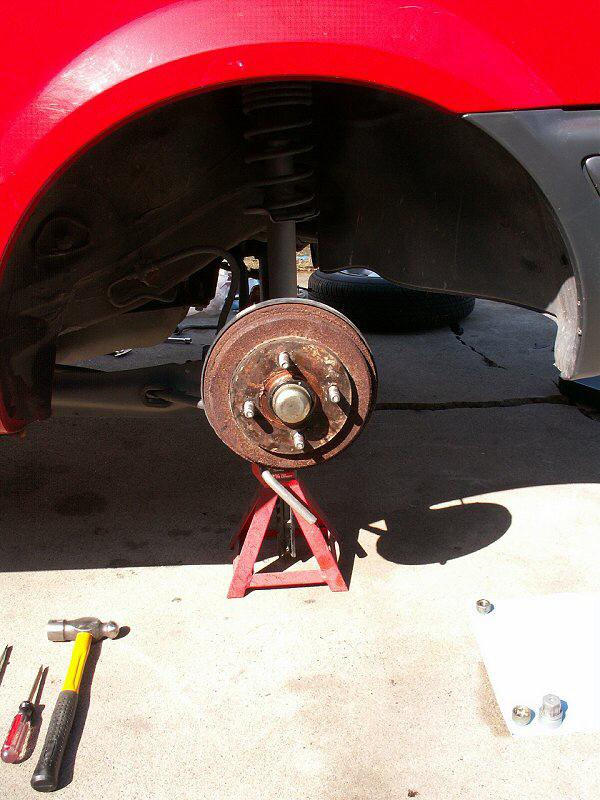 Start by removing the dust cover using a flat-head screwdriver/chisel and a hammer. Tap the cap alternating sides to pop it off. 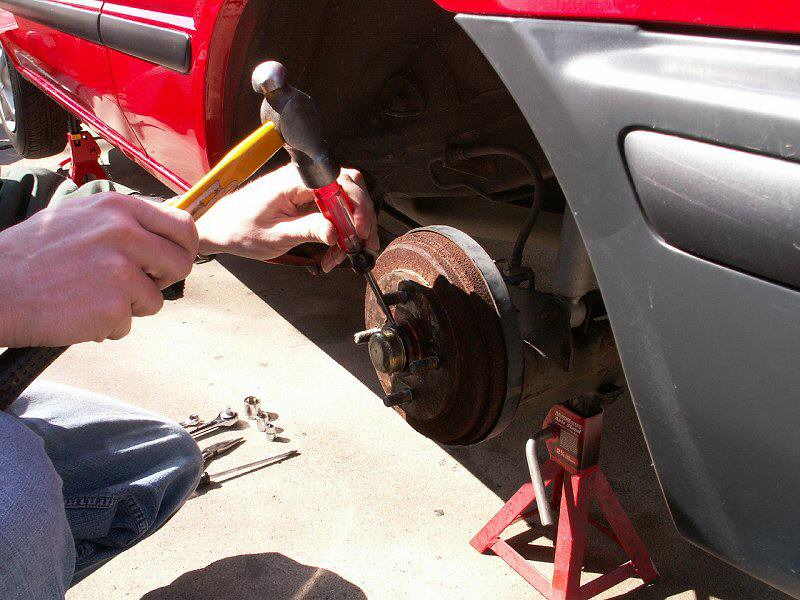 Now you'll see the cotterpin and nut retainer. Remove the pin using a set of needle-nose pliers to straighten the pin legs and then pull it out. The nut retainer should come right off after the pin has been removed. 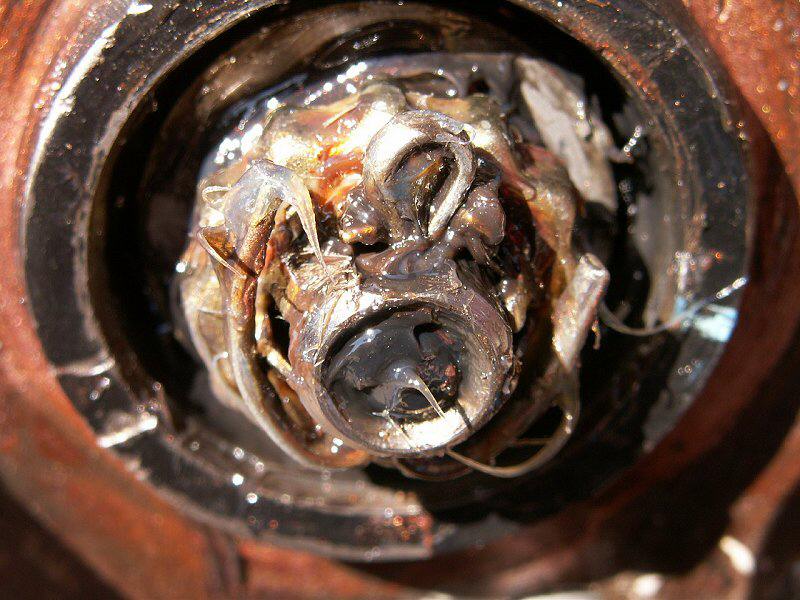  Now remove the nut with a 22mm socket. Both sides of the car use regular thread. No reverse threads here. So "righty-tighty, lefty-loosy" applies here too. 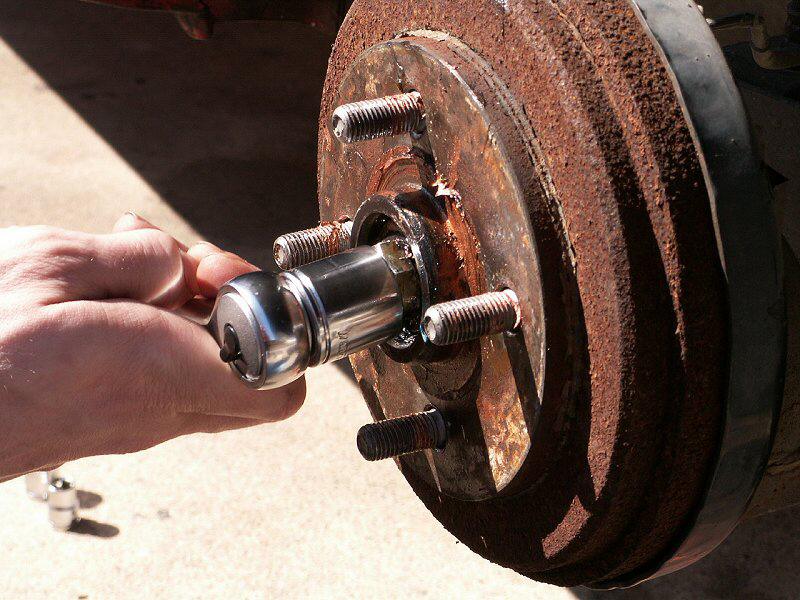 Remove the washer. The bearing should now come out easily. 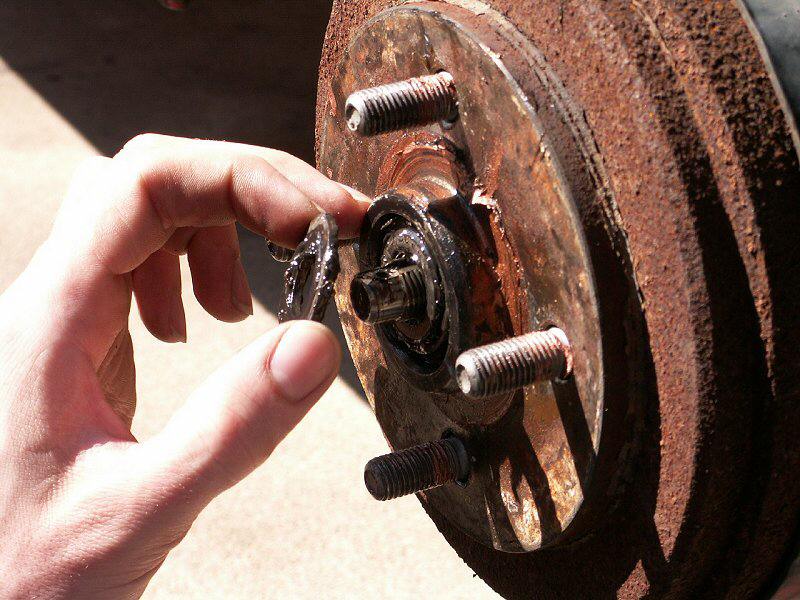 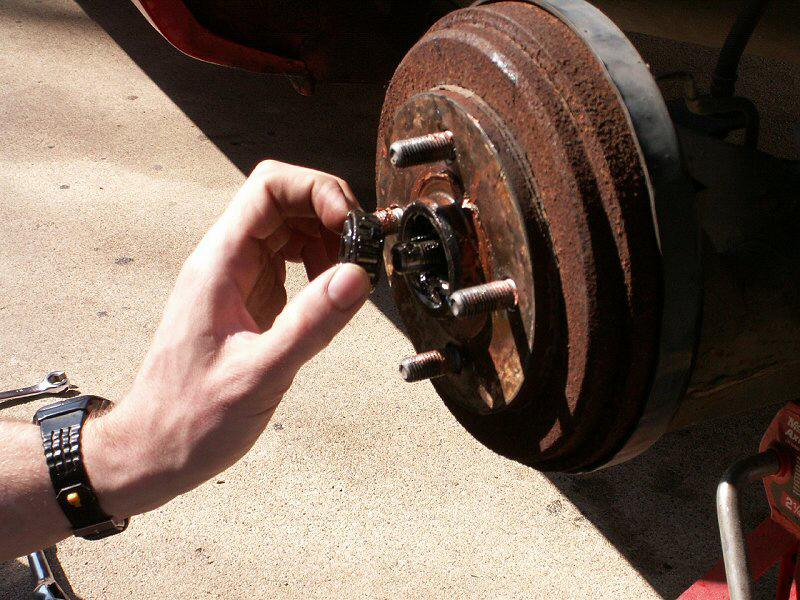 After the bearing has been removed the drum should come off. There may be some hesitation. If you need better leverage, try putting the wheel back on with a couple of lugnuts and use it for leverage. There is also an adjuster inside the drum brake assembly that can be accessed through a hole in the backing plate which is plugged with a rubber grommet. Release the shoes like that if you just can't get the drum off otherwise. Older drums usually have lips worn into the drum which makes them harder to remove. 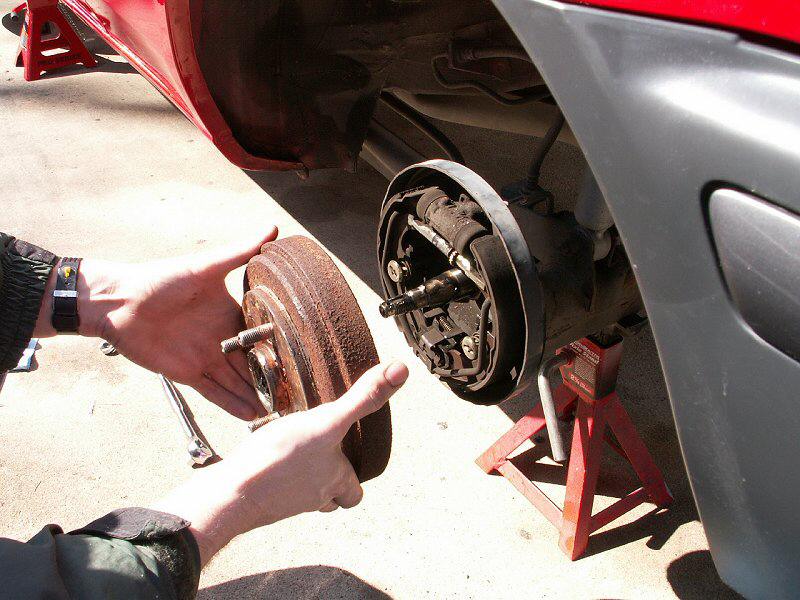 This is what you should be looking at after removing the drum. 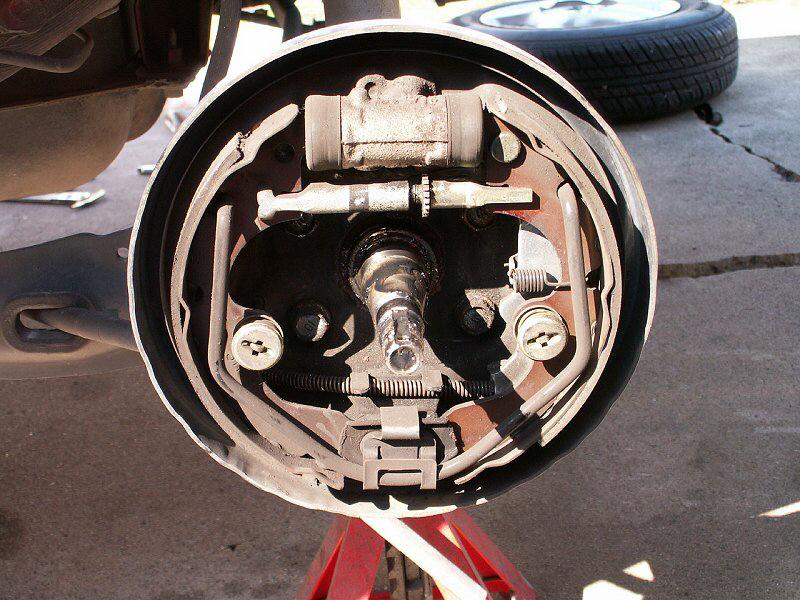 Remove the giant retractor spring by prying it off with a screwdriver or do like I did and use your hands. It's really not all that stiff. It's function is to retract the brake shoes when you let off the brake pedal. 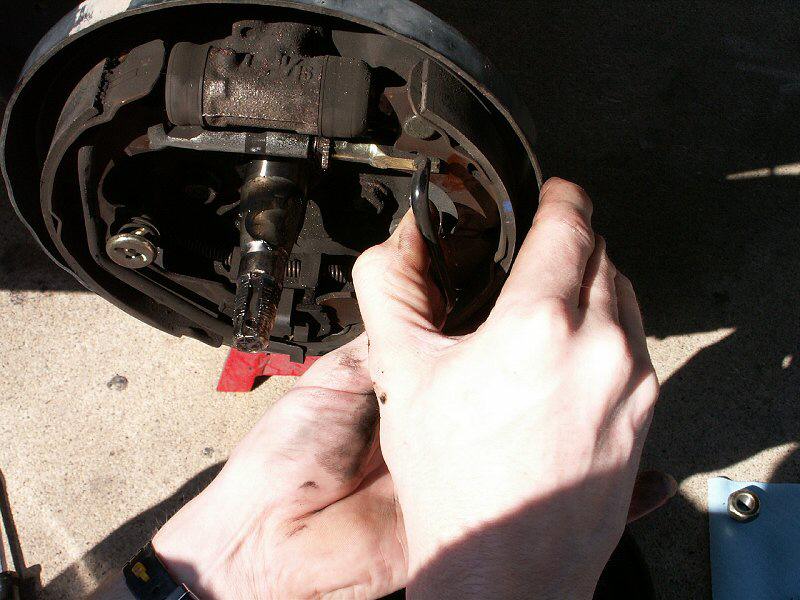 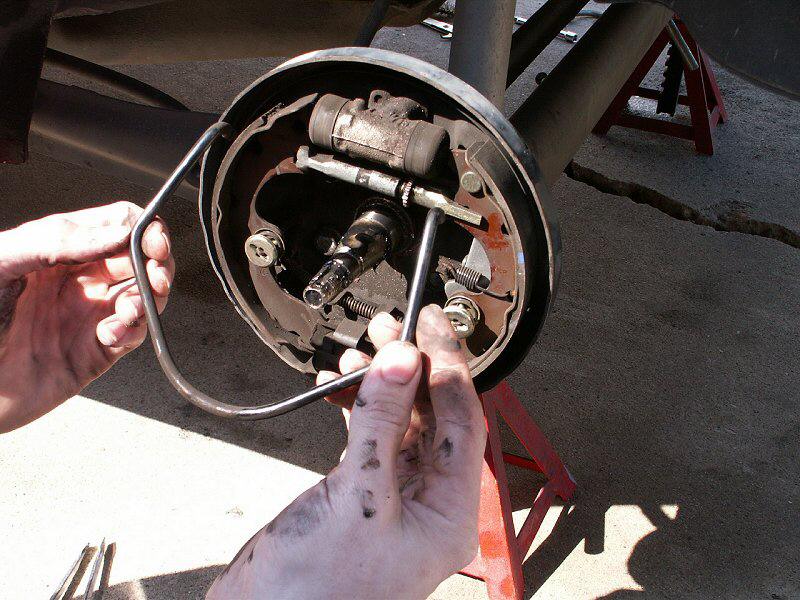 Next you need to remove the retaining pins. These hold the brake shoes in place. There's one in each shoe. Reach around back with one hand and hold the pin in place. Then with the other hand, push the front washer in and twist to release the washer. Now remove the pin, spring and both washers. 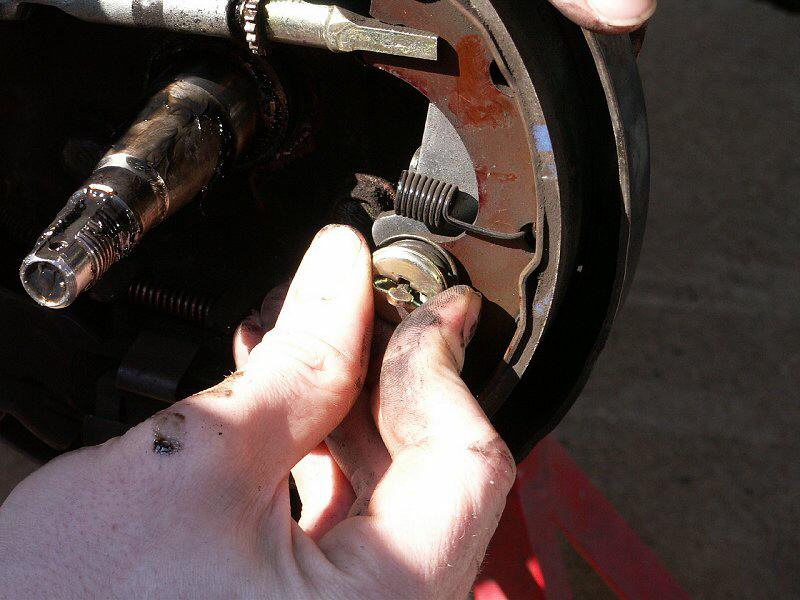 You should be able to remove the shoes one at a time. Remember not to lose the bottom spring that connects the two shoes. 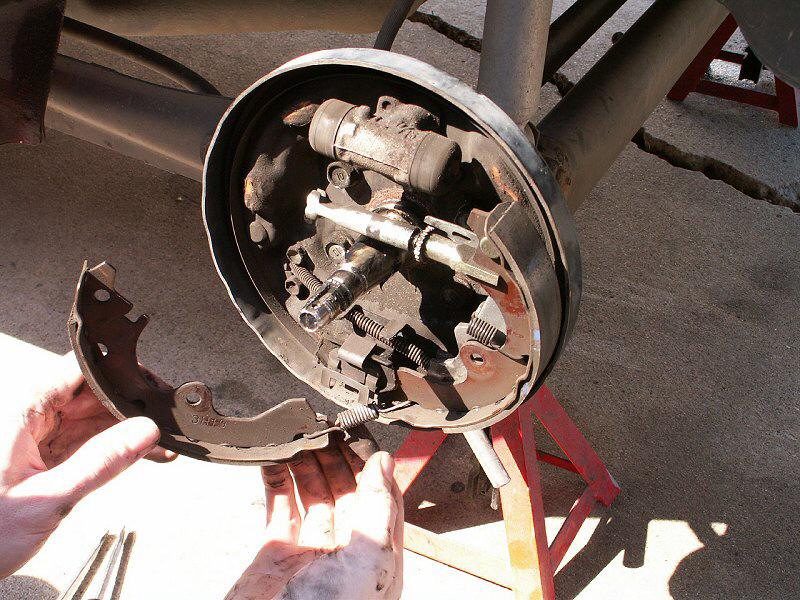 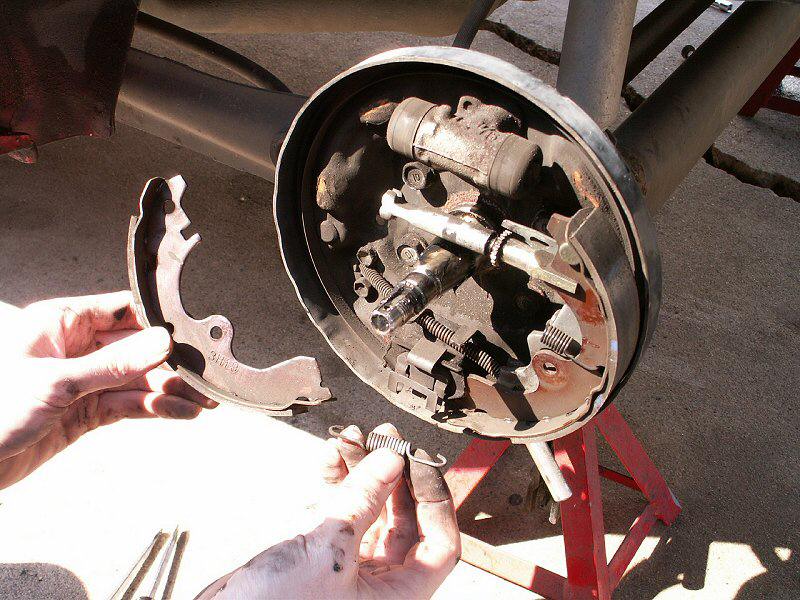 Now remove the e-brake cable. Just pull the spring back with your hand and slip the cable out of the bracket. 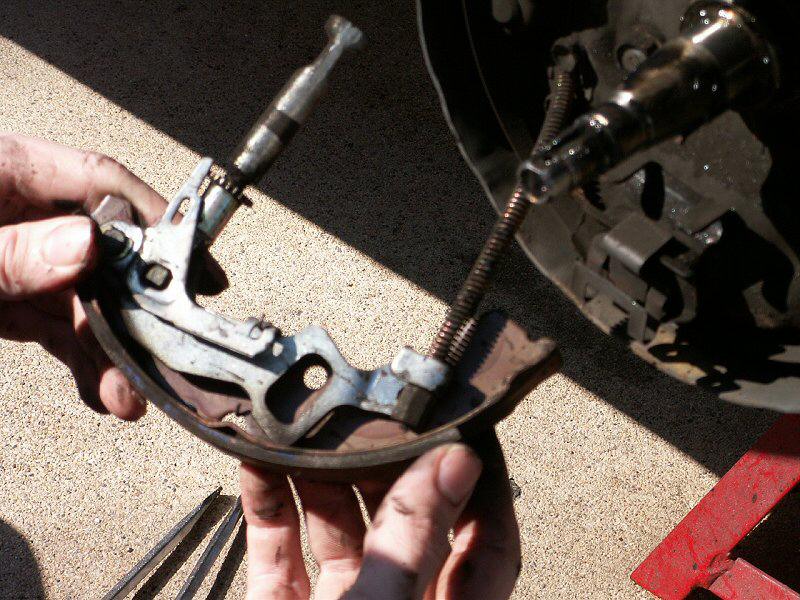 Release the e-brake cable from the backing plate by removing the two little bolts with a 10mm socket. 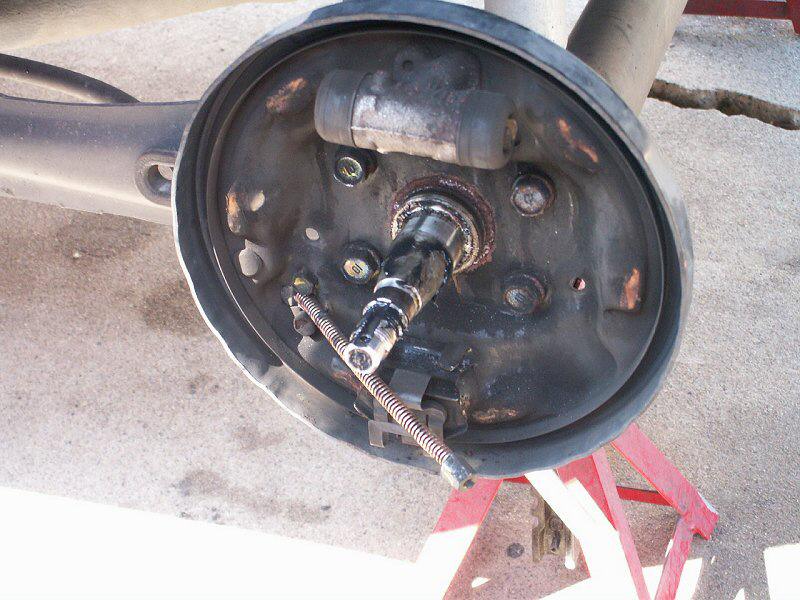 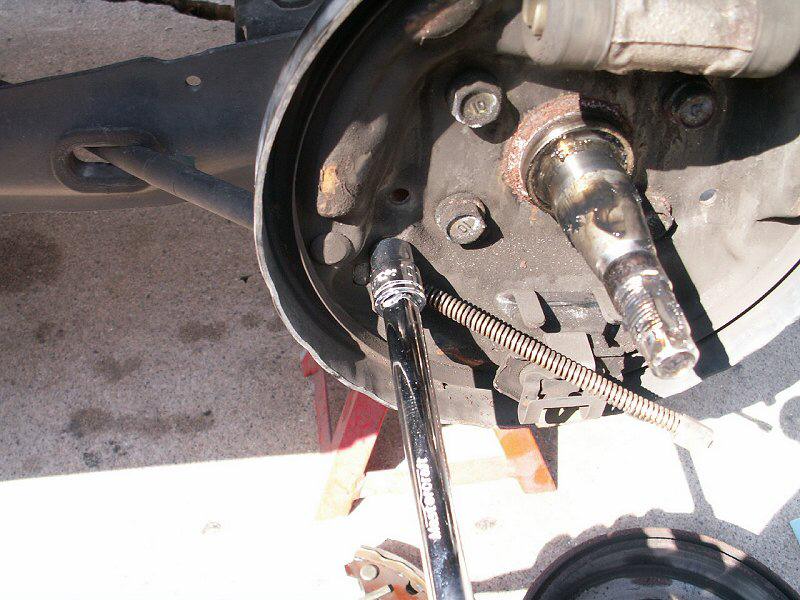 Now it's time to get under the car and unbolt the solid brake line from the axle. A standard open-end wrench will most likely strip the nut so use a linewrench. This is a special wrench that has more contact surface than an open ended wrench which will protect the nut and allow you to loosen even the most stubborn nut. It's like a box-ended wrench with a slot in it to slip over the pipe. 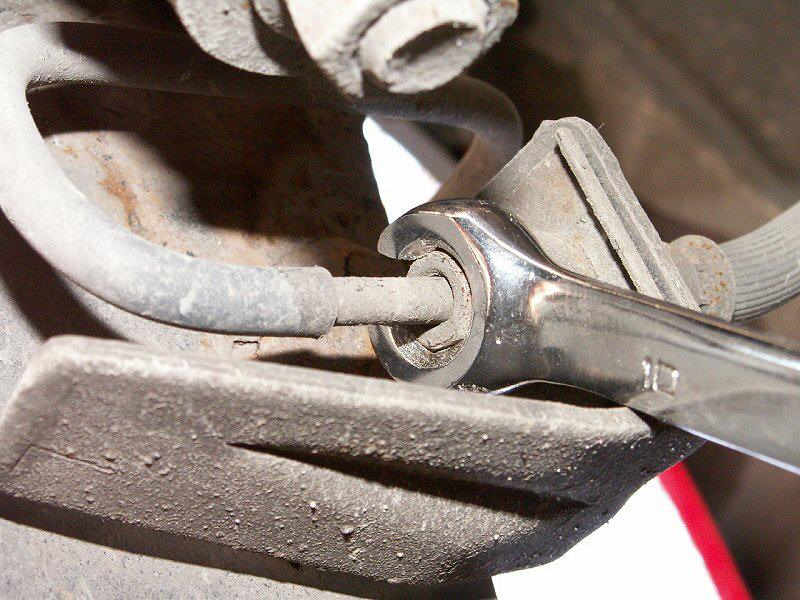 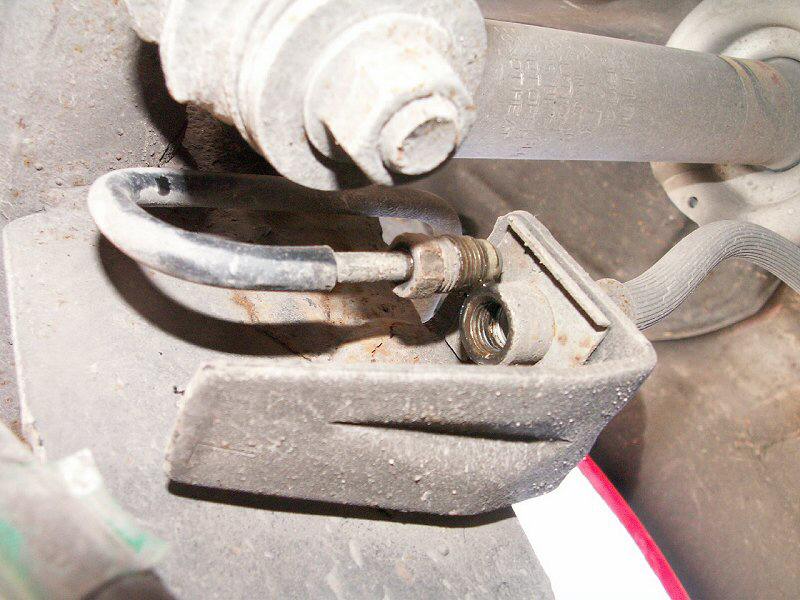 Now unbolt the backing plate from the axle by removing the 4 bolts with a 14mm socket. 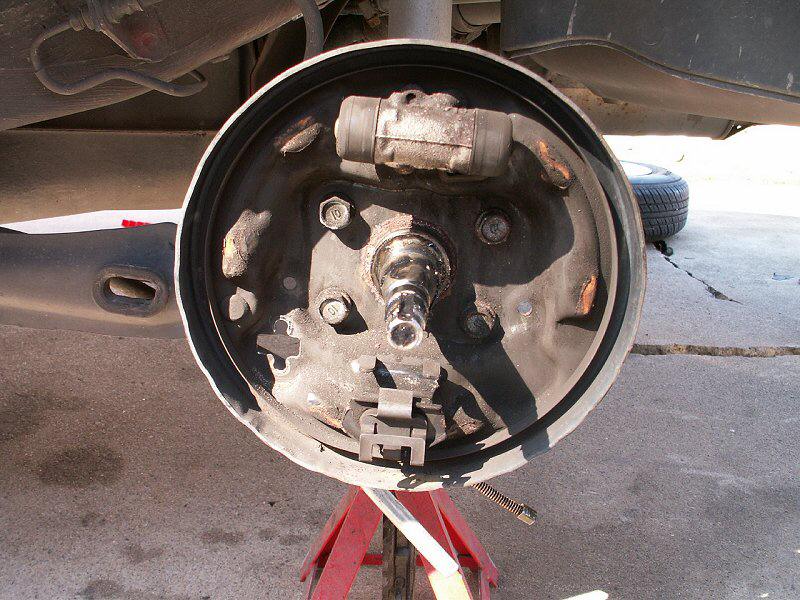 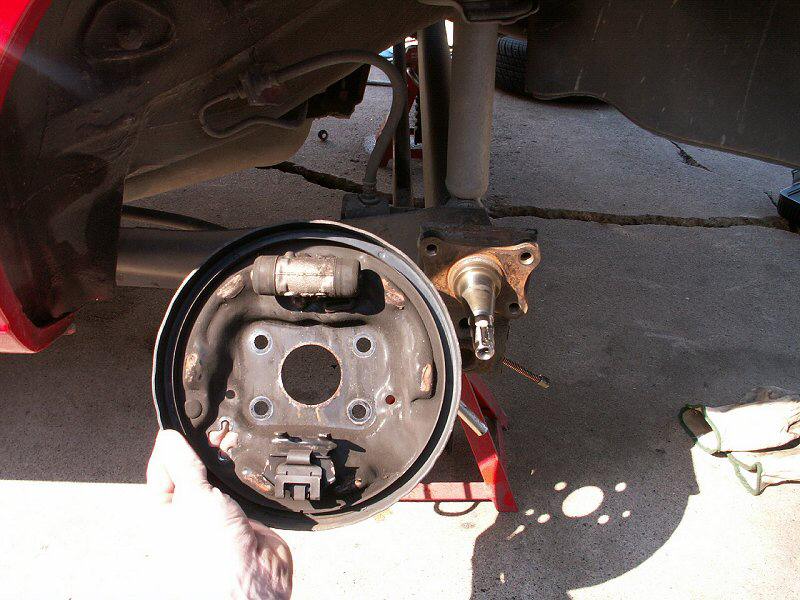 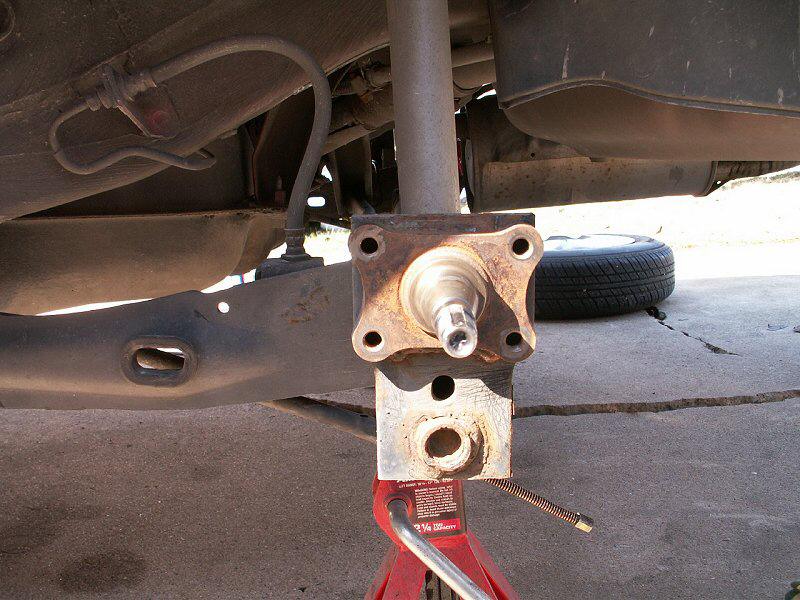 It's now time to prep the Starlet GT disc rotors. I know it's really rusty but I love it. 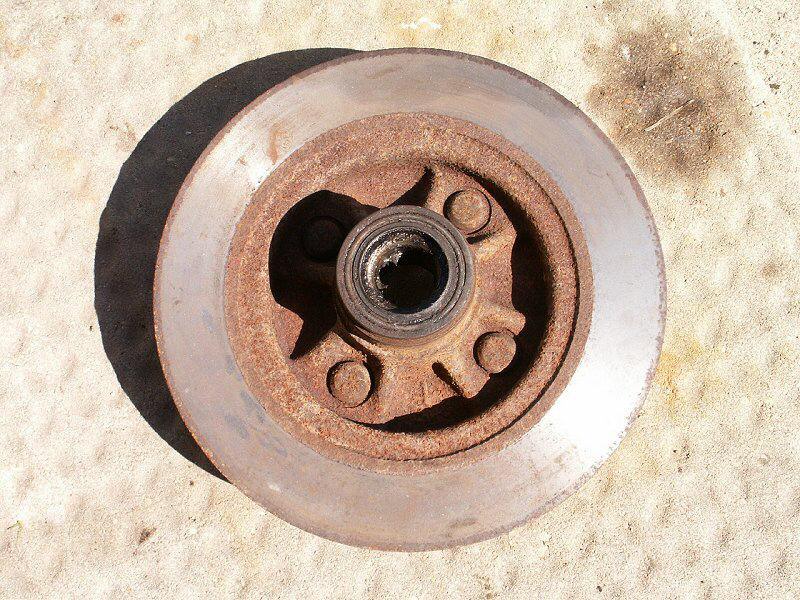 Remove the old inner bearing seal with this wicked seal puller. That seal puller looks like a weapon you say? Well I'd have to agree. After pulling the old seal. The bearing comes right out. 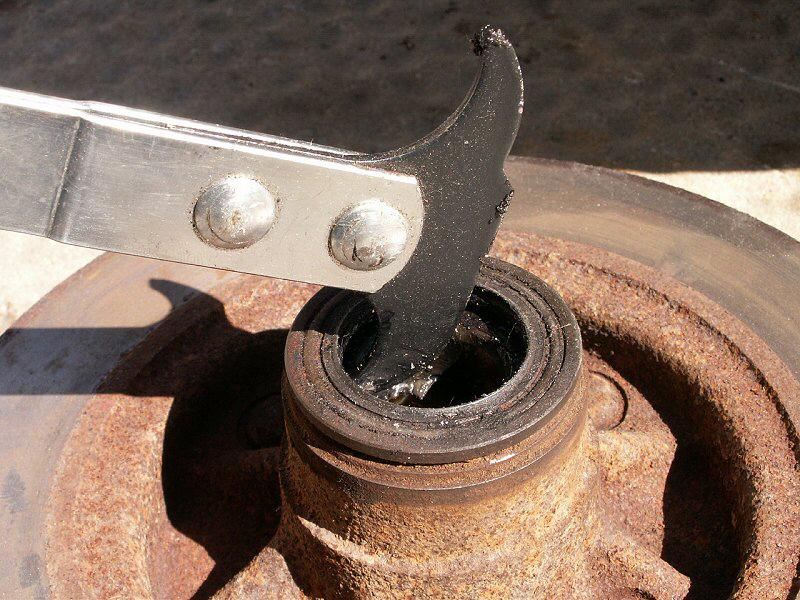 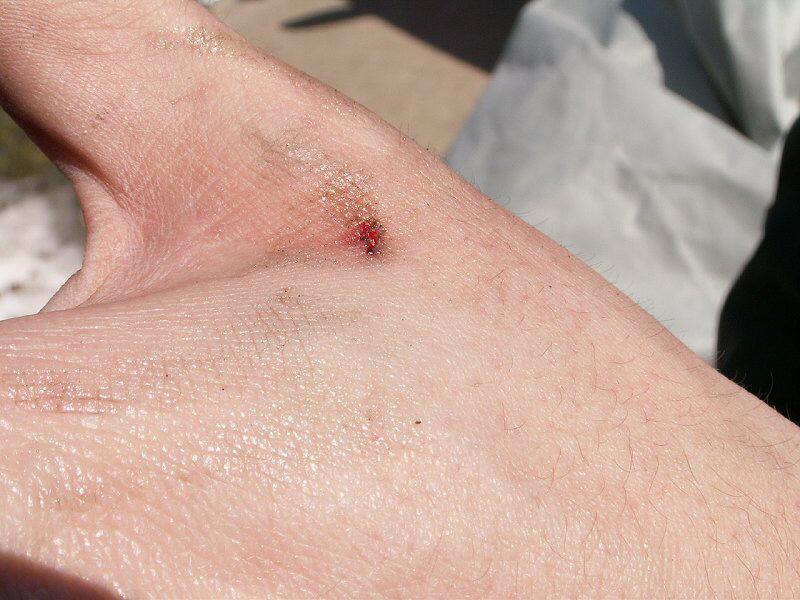 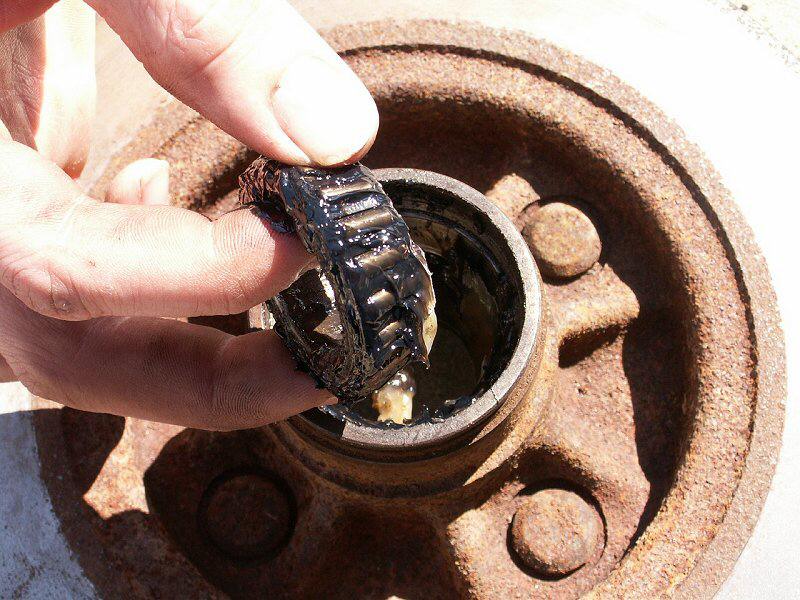 Let's hit the parts washer for some cleanup. You can tell I love this part....mmm....solvent. Clean the bearing out well and then blow it out with compressed air. You want to get ALL the old grease out. Do the same for the rotor. 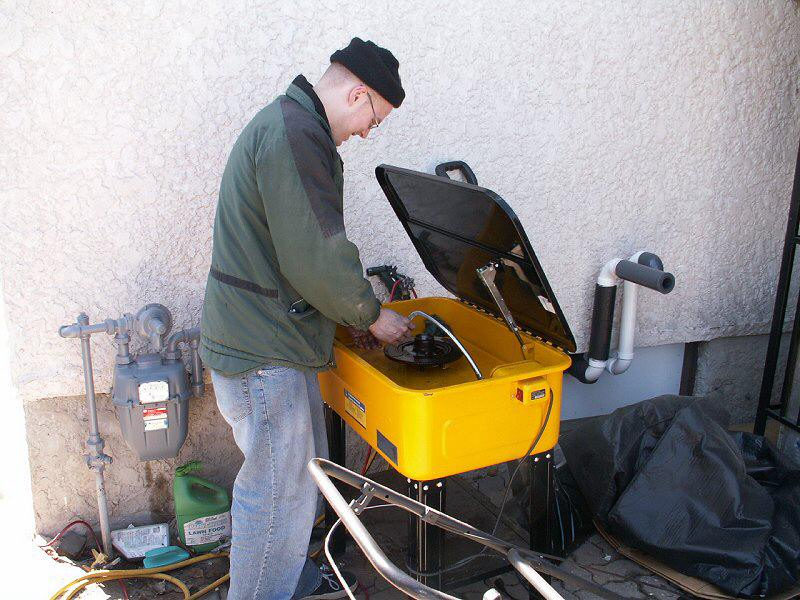 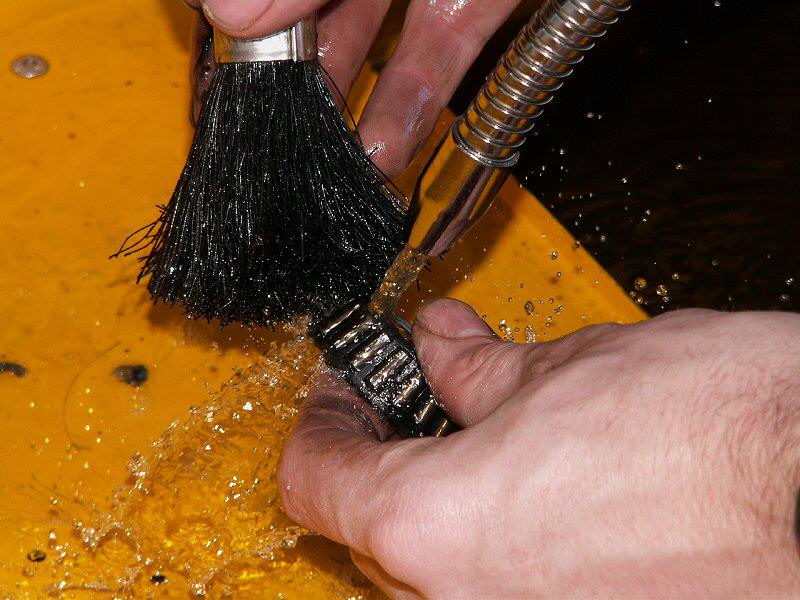 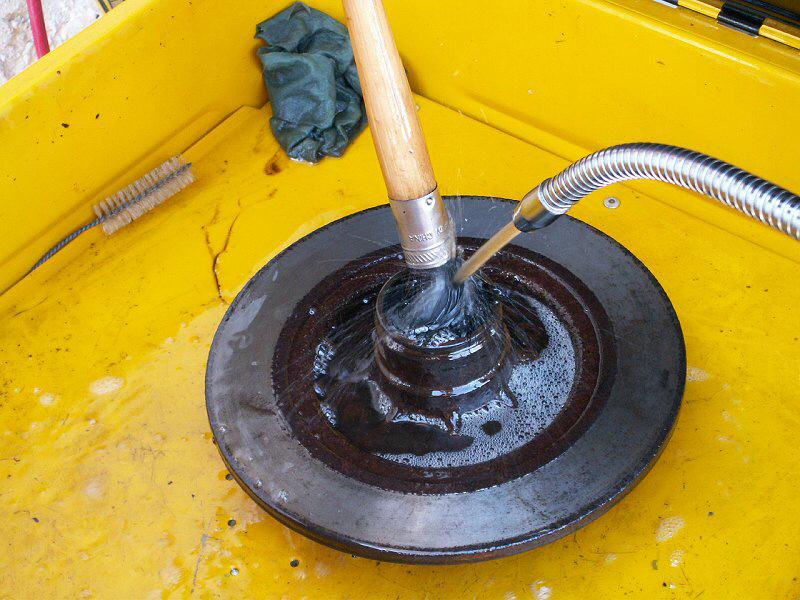 So fresh and so clean-lean-lean...sorry....anyways - back at the ranch... 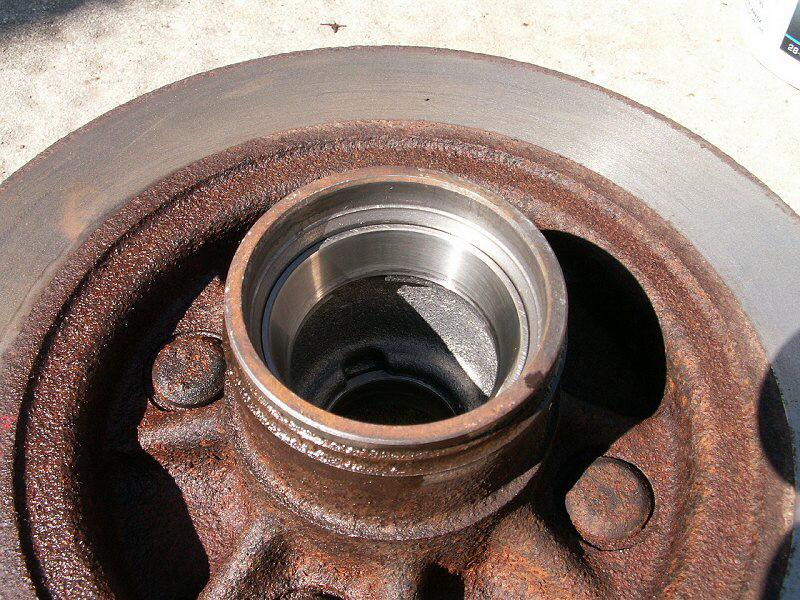 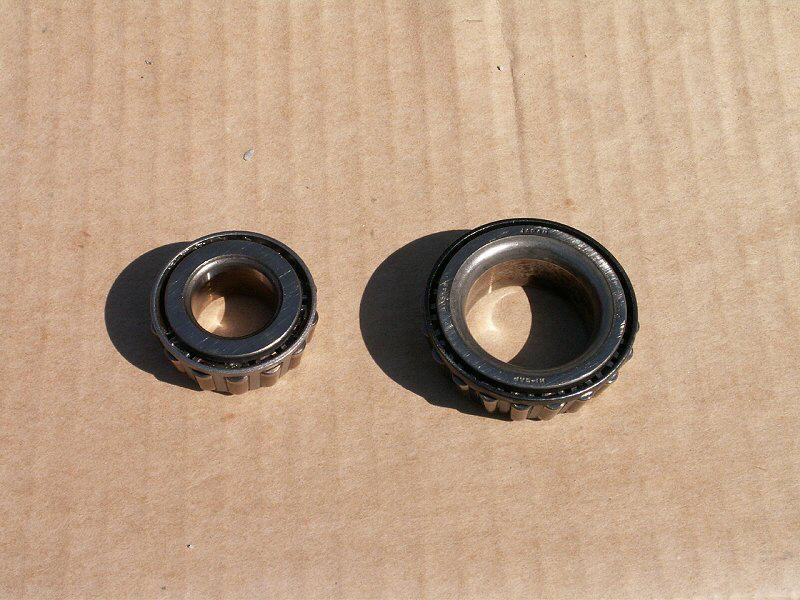 Repack the bearings with wheel bearing grease. I do it manually but you can use a bearing packer. You can use either the Tercel or Starlet bearings. But I prefer to use the Starlet bearings since the race is installed in the rotor already. Make sure to put some grease in the cavity of the rotor too to make sure the bearings will always have grease. 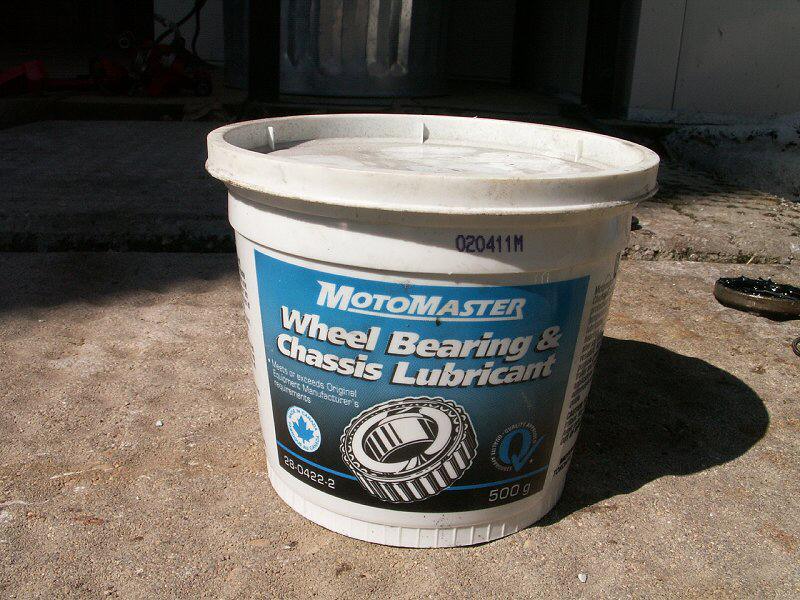 Now it's time to re-install a new Genuine Toyota Japanese built inner bearing seal. Again the USDM/CDM 91-99 Tercel seals fit the Starlet GT rotors.  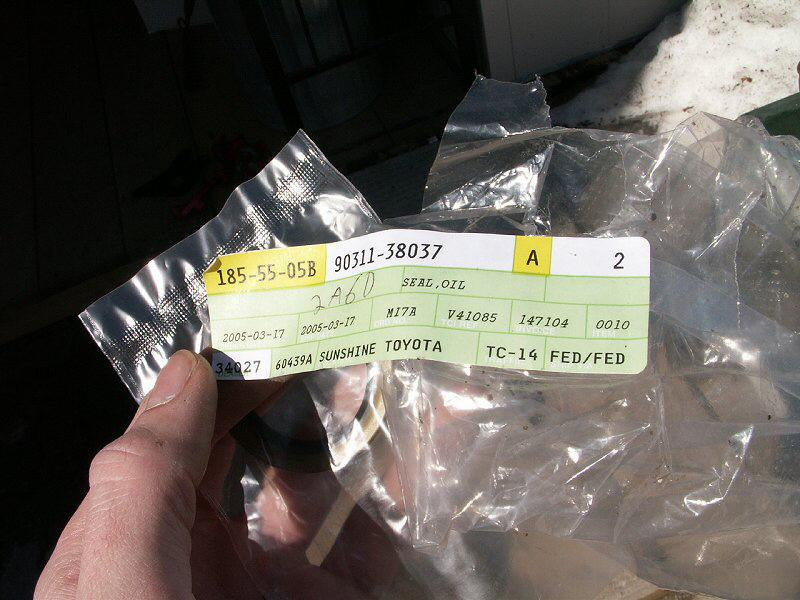 I didn't get a pic of the seal driver I used so here's what it looks like on top of the old drums. Use it to pound the new seal in nice and straight. Apply some wheel grease to inside of the seal to protect it later during sintallation. 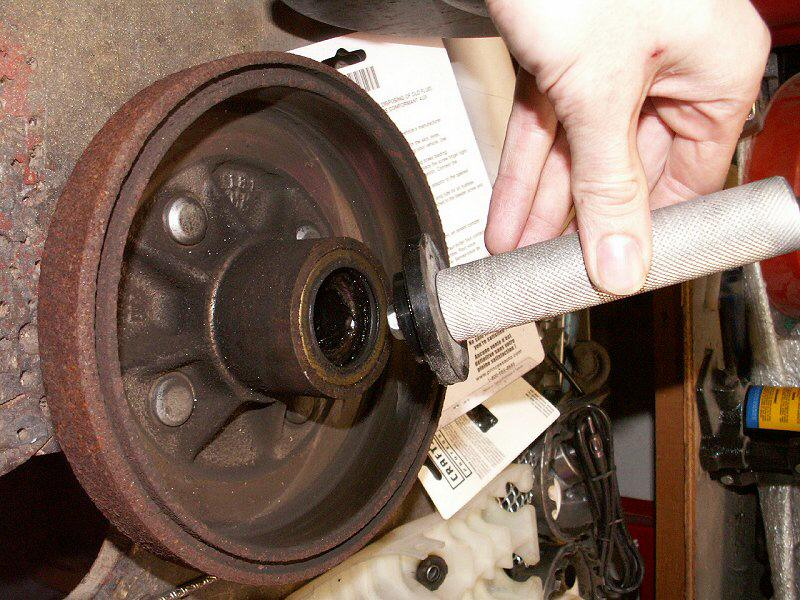 Now that the rotors are preped it's time to go back to the axle. Clean off the flat mating surface with a wire brush and sand paper. Then cover it with anti-cease just in case you ever need to remove it in the future. Bolt on the new backing plate with the longer bolts from the starlet GT setup. The Tercel bolts are too short. 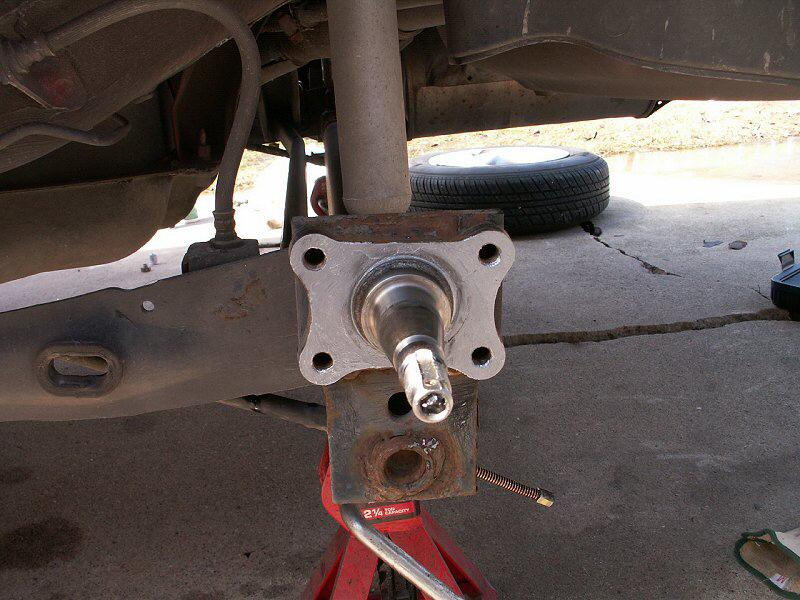  Coat the spindel with some more axle/wheel grease to protect the seal during installation. Slide the rotor onto the spindel and re-install the newly re-packed outter bearing, washer, nut, nut retainer, cotter pin, and dust cap. All those parts can be used from either your Tercel or the Starlet. They are all interchangable. 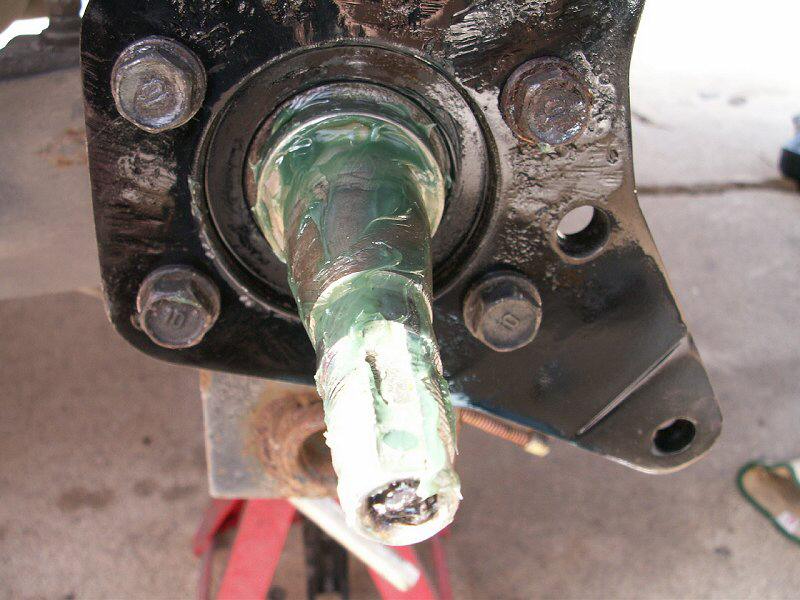 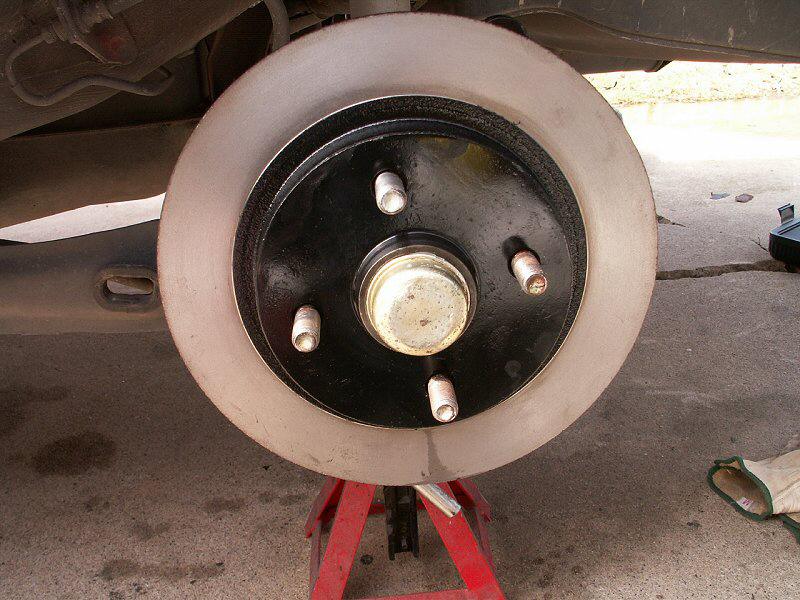 Bolt the caliper bracket to the backing plate. 12mm wrench. Now's also a good time to clean the rotors off with some aerosol brake cleaner to get all the grease and solvent off before installing new pads. 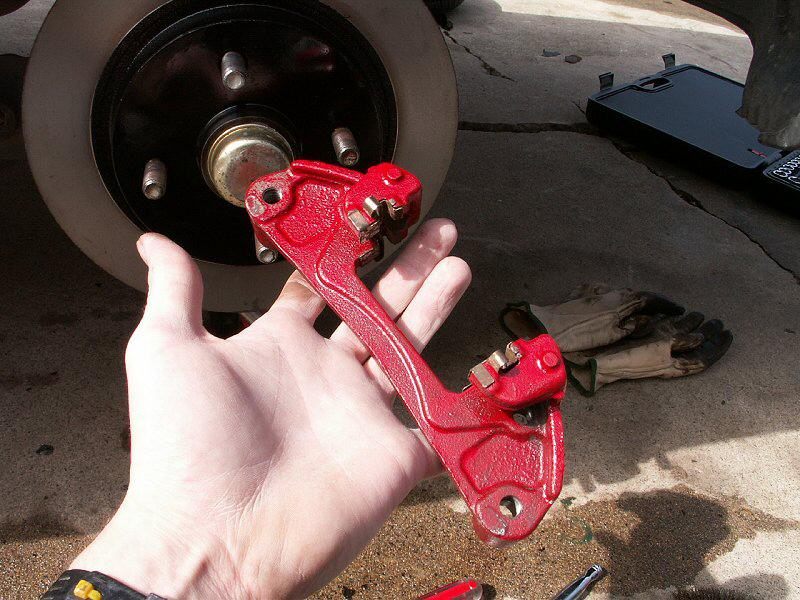 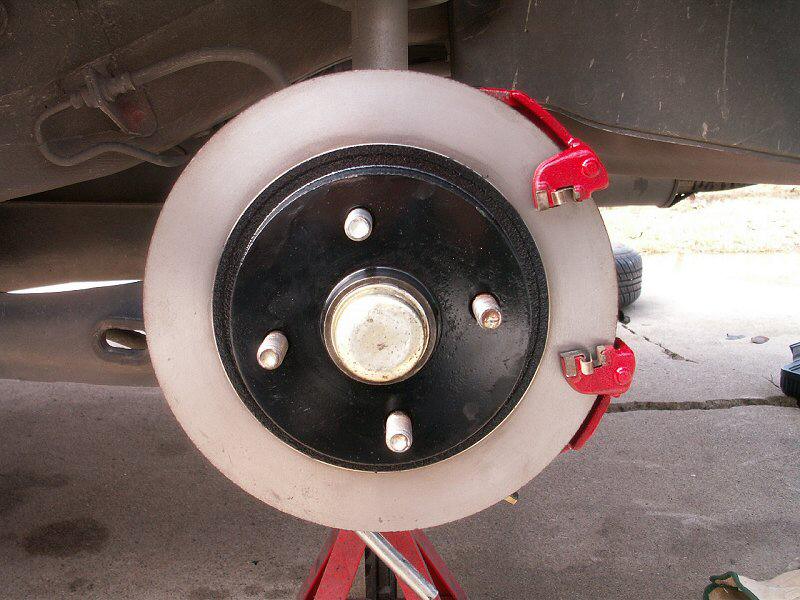 Open up one of your boxes of brand new Genuine Toyota pads. Install the pad shims. Again..rusty I know. Use some anti-squeek and apply it to the contact patch of the shims. 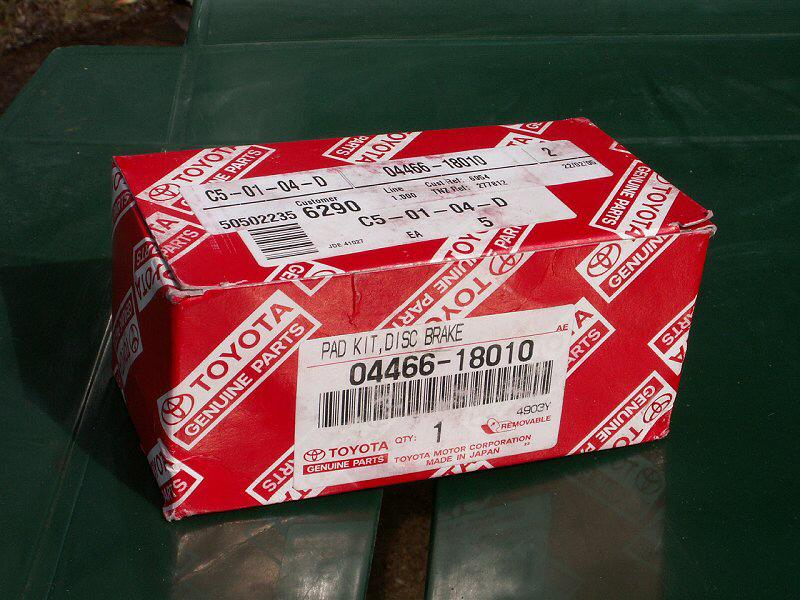    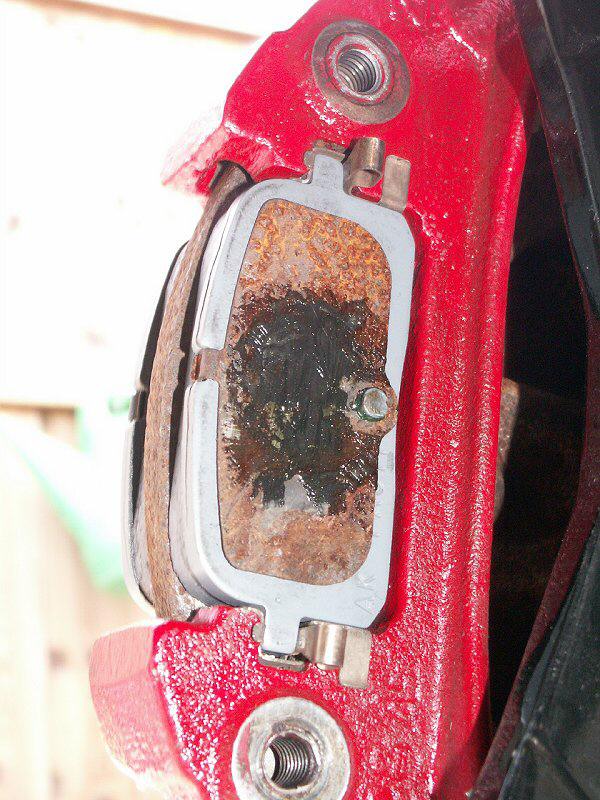 Time to prep the caliper. I had already rebuilt these but I had a couple of pieces left. Copper washers for the flexible brake hose. 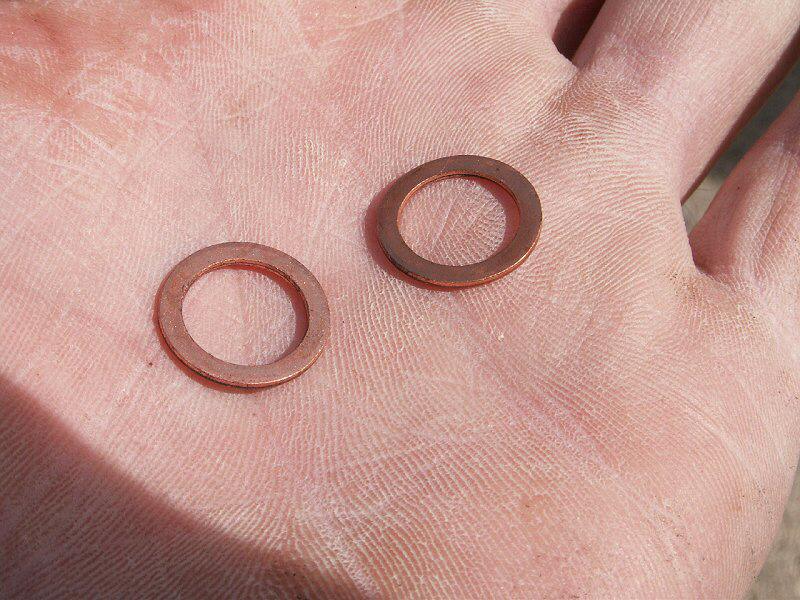 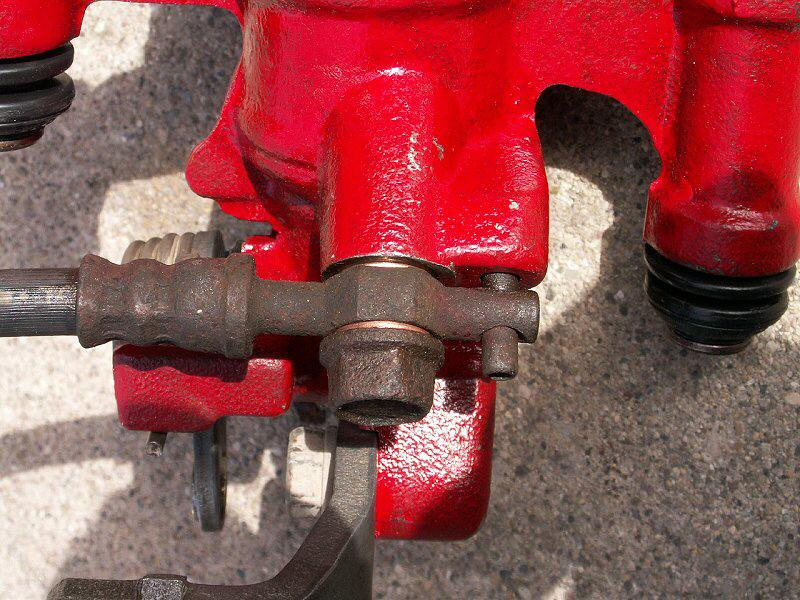 Make sure to retract and rotate the piston into this position before bolting the caliper to the bracket. The little bumps/tabs on the brake pads have to fit into that slot in the piston to keep it from rotating. So make sure it's installed properly. 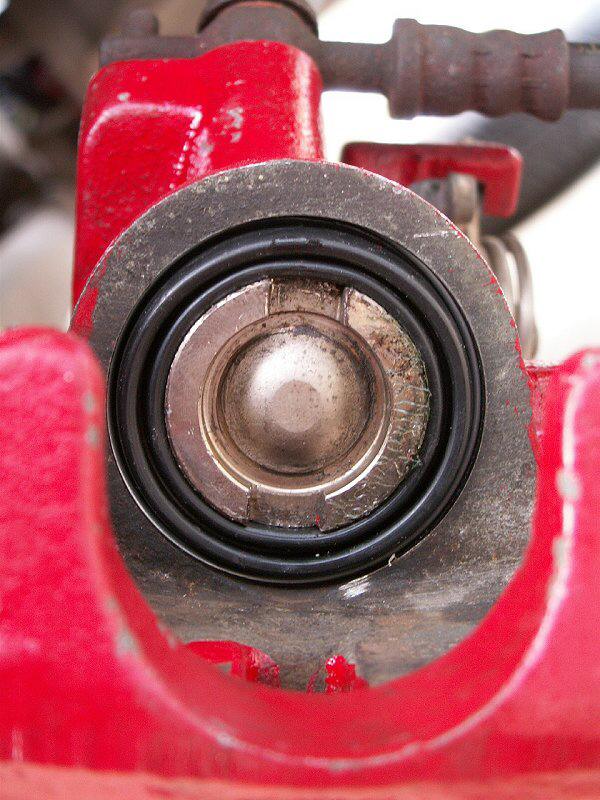 Now snap the other end of the hose in place on the bracket with the C-pin.  Attach the hard line from the Starlet setup. The Tercel line doesn't fit. You may be able to bend it to fit but if you have the Starlet lines, use them. IF you don't want to wreck your Tercel setup, then go out and buy some hard lines with connectors and bend it to suit your needs. They cost less than $10 each. 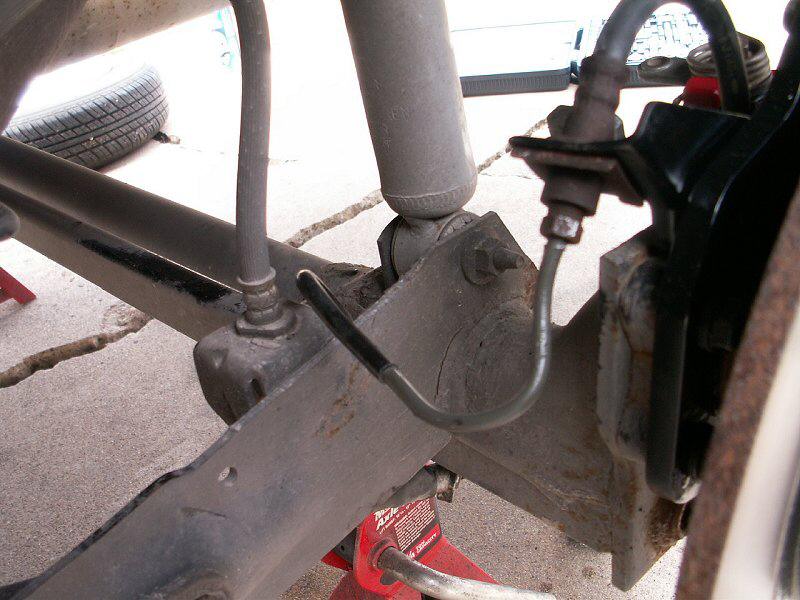 Sh!t that's sexy. 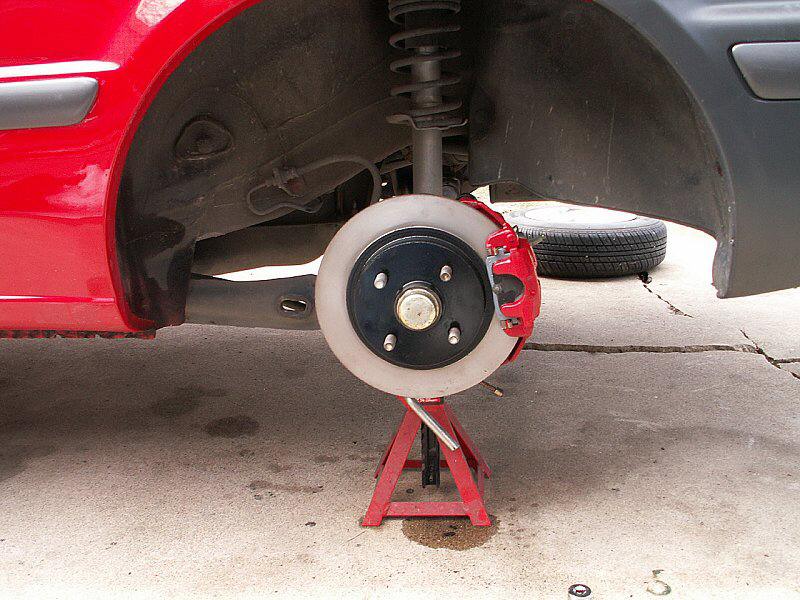 Ok when you're done admiring your own work it's time to get messy again. Time to hook up the Starlet GT e-brake cables. I won't sugar coat it. This part suxorz. You have to remove the aluminum exhaust heat shield to get at the e-brake cables. 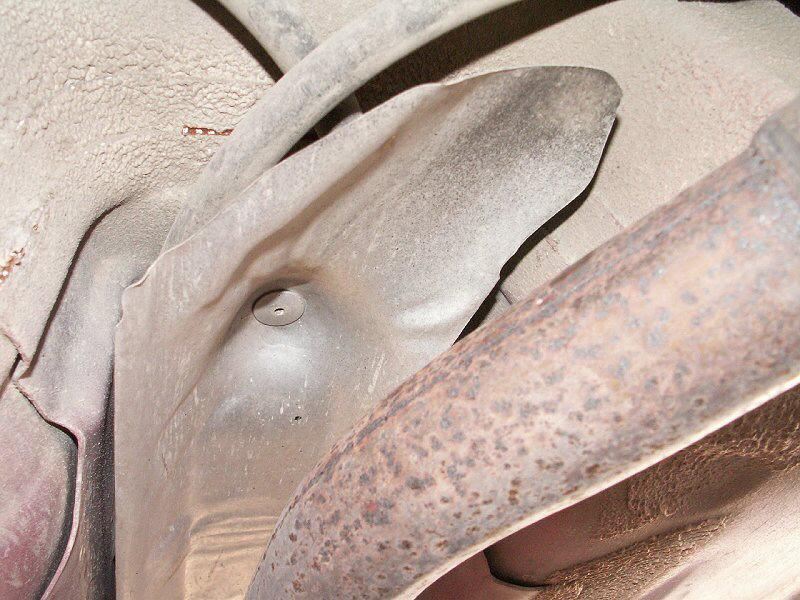  You're gonna have to make some room to work in there so unhook the rear muffler hanger and slide the whole exhaust off to either side. 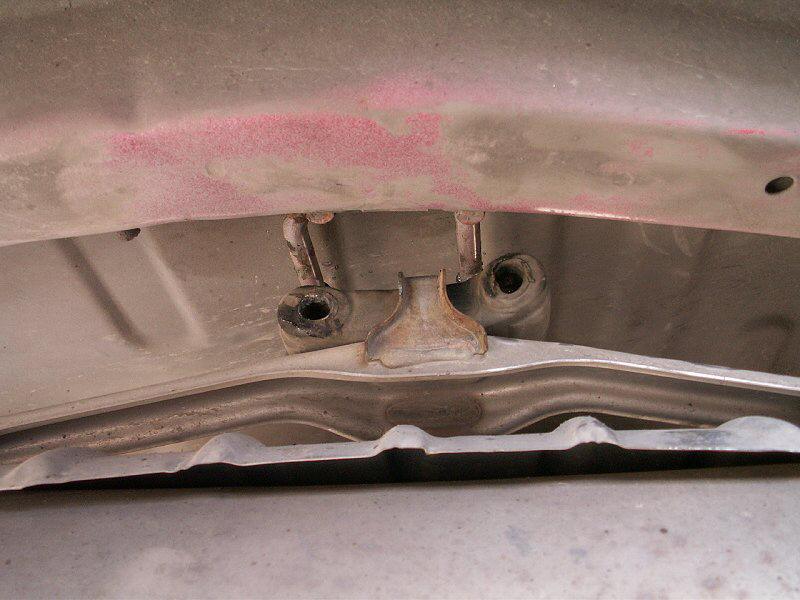 Then using a large drilbit to drill out the 3 aluminum rivets that hold the shield in place. Don't worry. You can re-install it later. 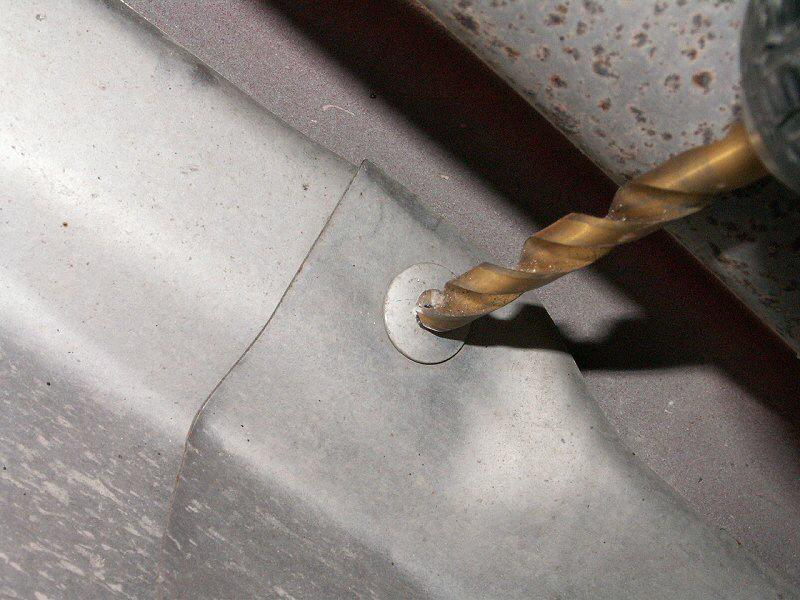 Now get in the car and take your 10mm socket, extenssion and ratchet with you. Loosen the adjustor nut as far as you can without backing it off the bolt all together. 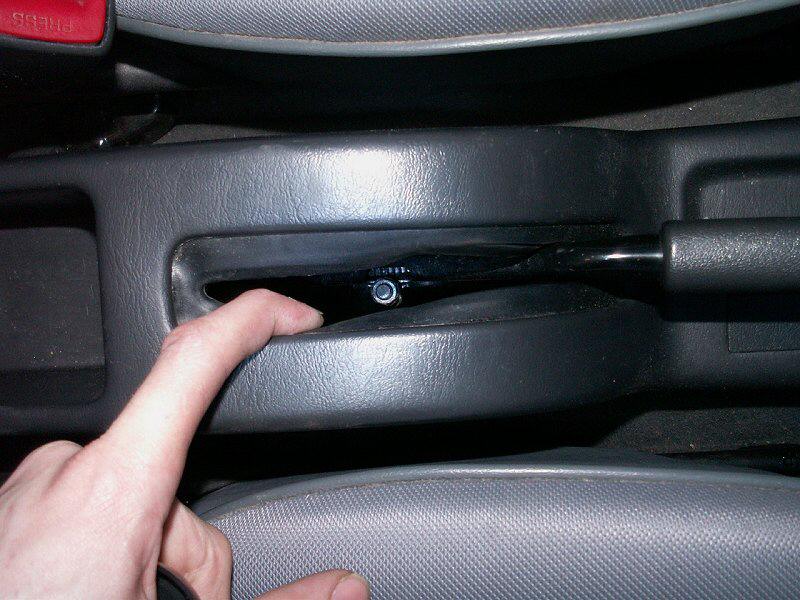 Get back under the car and remove the cables with a 10mm socket. 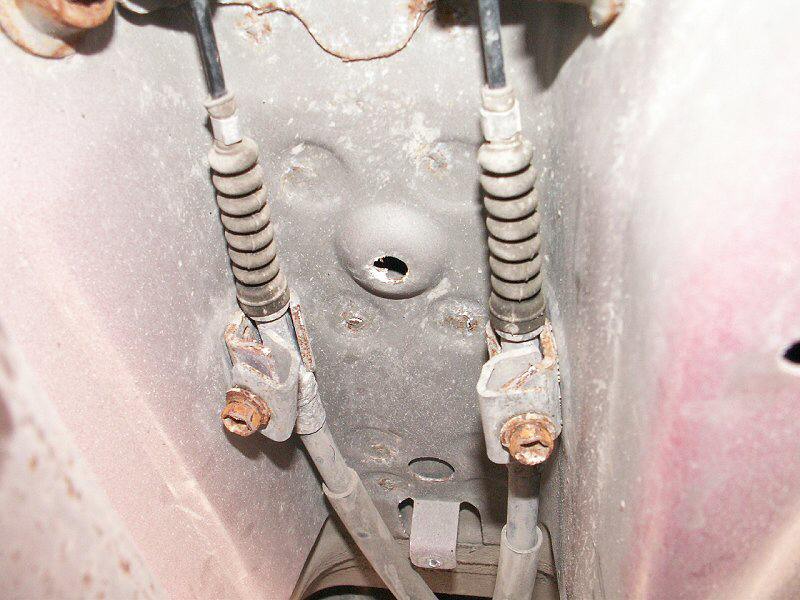  Now you'll run into a problem. At least I did on my 98 Tercel. Starlet cable on the left - Tercel cable on the right. I had to fab up some sleeves out of a piece of 10mm conduit to solve the problem. MINT!!!! 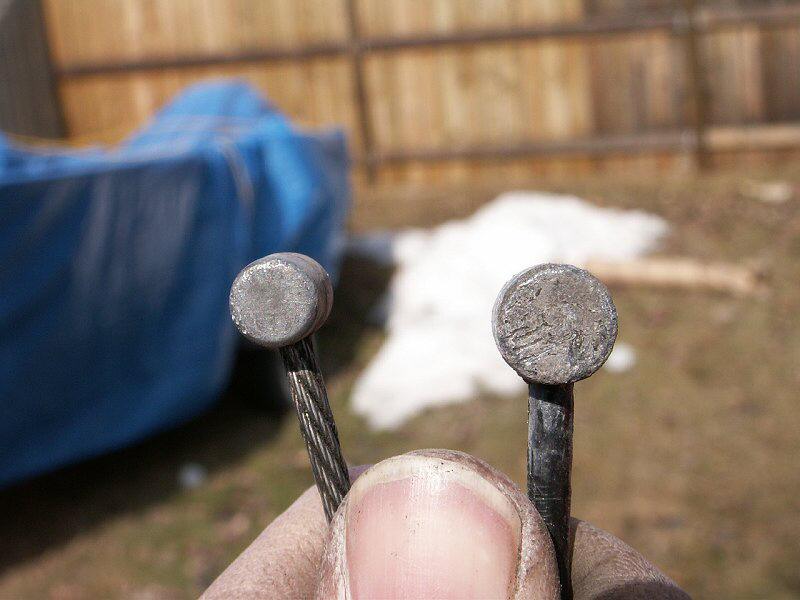 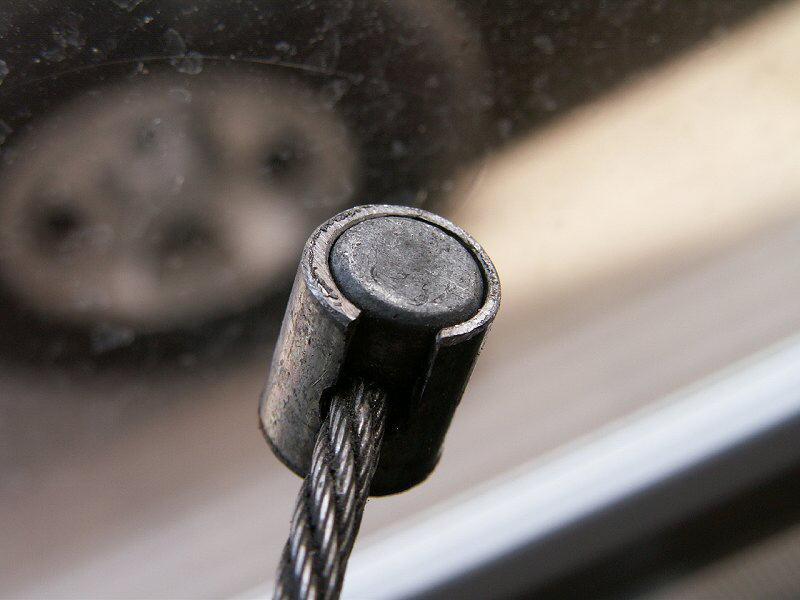 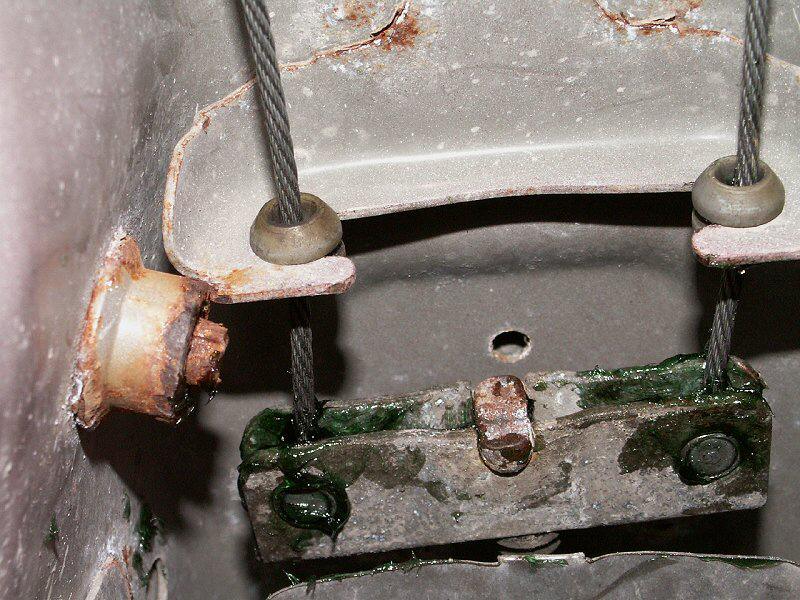 Unfortunatly the Starlet is a little shorter than a Tercel so it's cables too are a little shorter than the Tercel's. So you can only use one mounting point on each side. 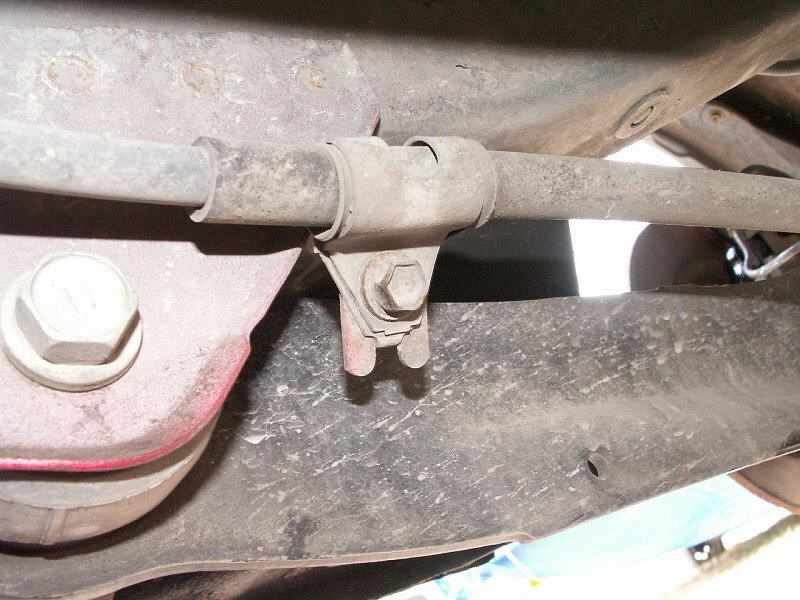 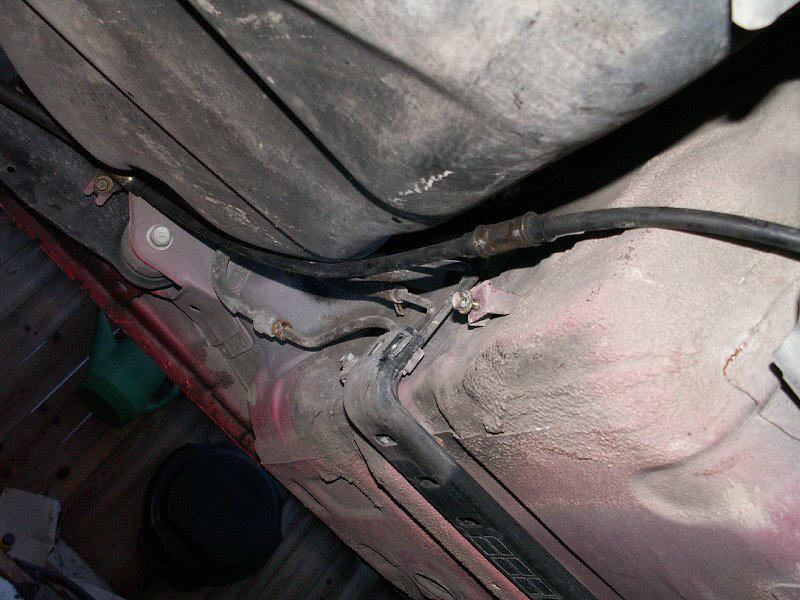 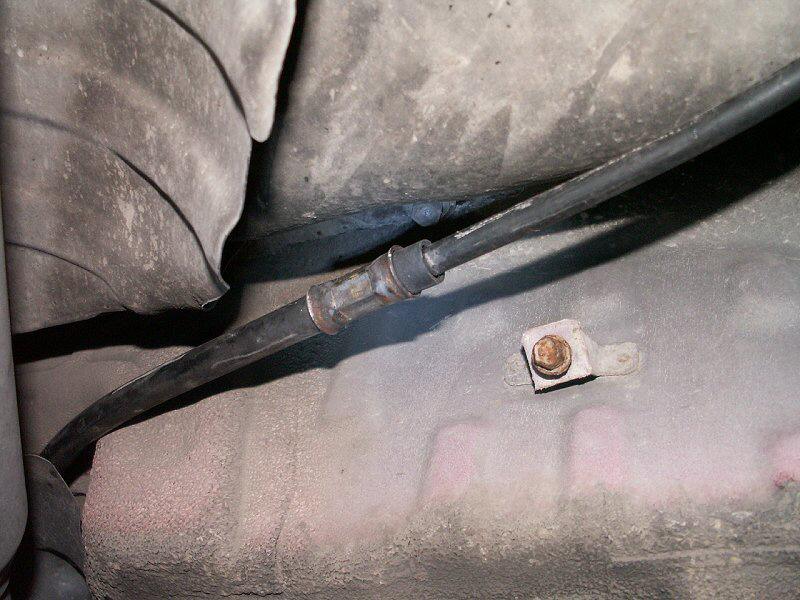 Route the cable through the stock location on the axle. You will have to remove the grommet and then pass the cable through the hole. Reinstall the grommet over the cable and squeeze it back into the hole. 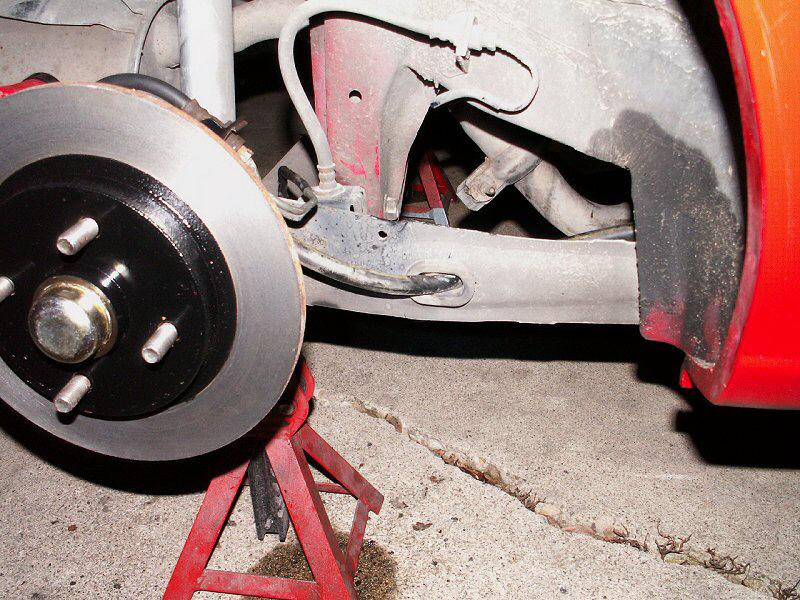 I didn't get any pins to attach the cables to the rear calipers so I had to make some. I used some TOYOTA bolts that I had lying around. I cut them to length and drilled them for a cotter pin. 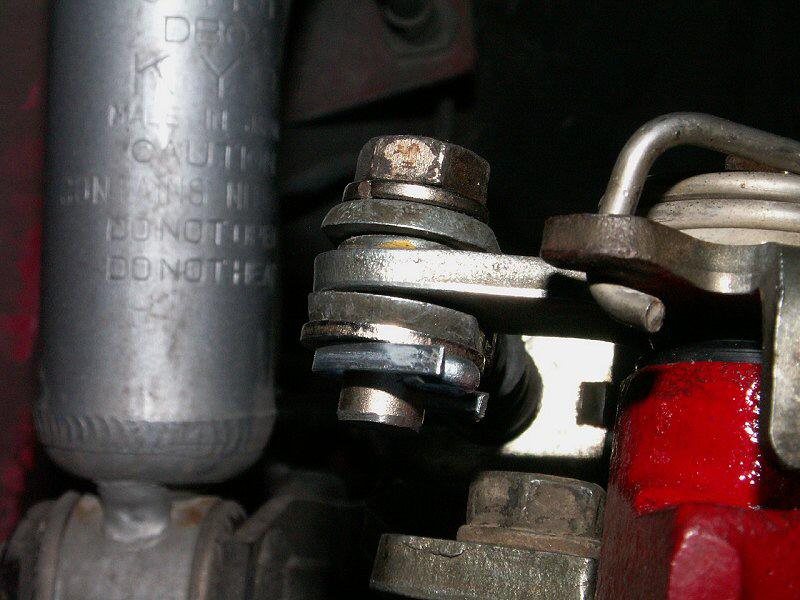 Now that you're done with the cables you can re-install the heat shields using some standard aluminum pop-rivets. 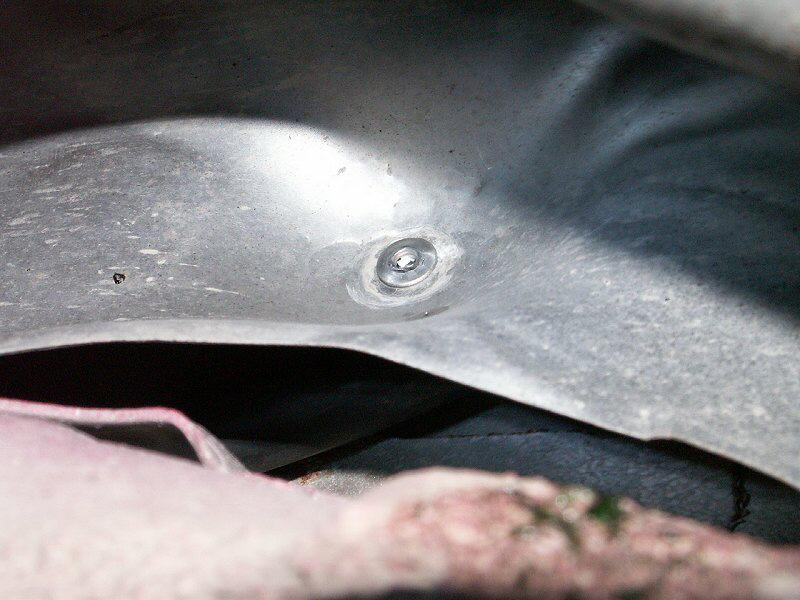 Go back into the cab and tighten that e-brake tentioner nut. That's it. You're done. Now just bleed the brakes and top off the brake fluid. Put the wheels back on and you're ready for a test run. BTW this setup will fit with 13" stock wheels. 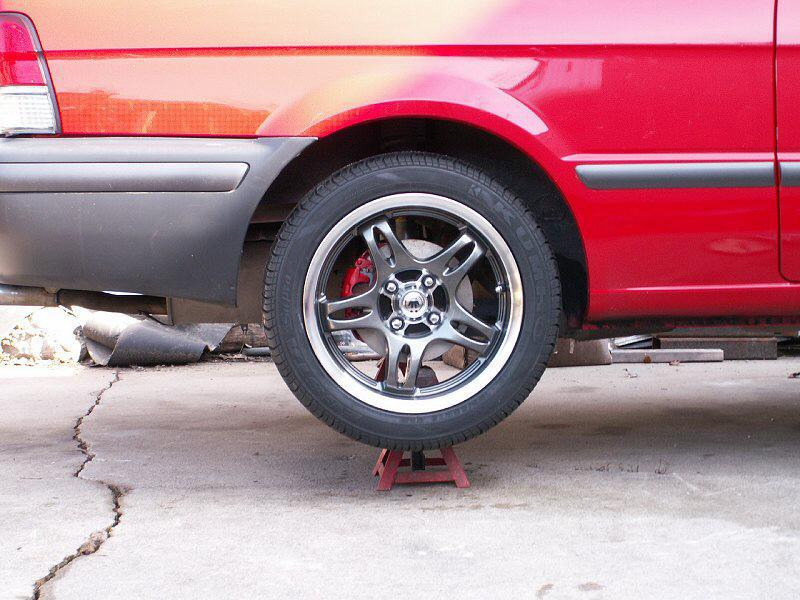
__________________

|

|

|
| Sponsored Links |
||||||
|
|
26-Jan-2009, 15:39
|
#2 |
|
Senior Member
Fecha de Ingreso: 08-December-2008
Ubicación: Usa
magDraraVE
Tiempo: CharlesBoale
Mensajes: 2.401
Feedback Score: 40 reviews
|
Re: conversion a discos traseros en tercel
Que buana info.-
Algo así estaba buscando haber cuando me animo.- ahora mi pregunta es sera que después se le puede adaptar cualquier disco, o solo el de Starlet.
__________________
Discover the world of uninhibited dating. |
|
|
|
|
26-Jan-2009, 18:23
|
#3 |
|
Senior Member
Fecha de Ingreso: 30-December-2007
Ubicación: GuAtEmAlA
starlet 95
Mensajes: 1.845
Feedback Score: 10 reviews
|
Re: conversion a discos traseros en tercel
ta buena la info aver si me animo pero con el starlet
|
|
|
|
|
26-Jan-2009, 19:58
|
#4 |
|
100% stock :D
Fecha de Ingreso: 12-October-2006
Silvia S14
Mensajes: 17.196
Feedback Score: 33 reviews
|
Re: conversion a discos traseros en tercel
que buen thread vos
 excelente upgrade pa los tercel/paseo/starlet n/a se siente un talegoooo la mejora en el frenado  aparte de lo virgo que se ve con discos en las 4 ruedas aparte de lo virgo que se ve con discos en las 4 ruedas 
__________________
Última edición por carlosrafa; 26-Jan-2009 a las 20:32 |
|
|
|
|
26-Jan-2009, 20:07
|
#5 |
|
Senior Member
Fecha de Ingreso: 30-November-2007
Ubicación: Guatemala
tercel,trooper,corollag6
Tiempo: 13s
Mensajes: 172
Feedback Score: 1 reviews
|
Re: conversion a discos traseros en tercel
simon se miran de ahuevo los tercel con 4 discos, dentro de poco el mio ya va a tener discos en las 4 ruedas, y aprovechando que lo tengo desarmado voy a ver si lo logro convertir en T3
|
|
|
|
|
26-Jan-2009, 21:37
|
#6 |
|
Senior Member
Fecha de Ingreso: 16-June-2006
Mensajes: 4.362
Feedback Score: 41 reviews
|
Re: conversion a discos traseros en tercel
y haciendolo de esa forma en cuanto podra salir el chancecito

__________________

|
|
|
|
|
26-Jan-2009, 21:50
|
#7 |
|
TRD
Fecha de Ingreso: 23-February-2008
Ubicación: Amatitlan
Corolla S 2016
Tiempo: 17.05/11.56
Mensajes: 985
Feedback Score: 0 reviews
|
Re: conversion a discos traseros en tercel
sera que le hacen los mismos discos a un yaris
__________________
|
|
|
|
|
26-Jan-2009, 21:52
|
#8 | |
|
100% stock :D
Fecha de Ingreso: 12-October-2006
Silvia S14
Mensajes: 17.196
Feedback Score: 33 reviews
|
Re: conversion a discos traseros en tercel
Cita:
|
|
|
|
|
|
26-Jan-2009, 21:54
|
#9 |
|
TRD
Fecha de Ingreso: 23-February-2008
Ubicación: Amatitlan
Corolla S 2016
Tiempo: 17.05/11.56
Mensajes: 985
Feedback Score: 0 reviews
|
Re: conversion a discos traseros en tercel
ya le vuelta a un monton de hueceras y ni a putas
|
|
|
|
|
26-Jan-2009, 21:56
|
#10 | |
|
100% stock :D
Fecha de Ingreso: 12-October-2006
Silvia S14
Mensajes: 17.196
Feedback Score: 33 reviews
|
Re: conversion a discos traseros en tercel
Cita:
|
|
|
|
|
|
26-Jan-2009, 23:14
|
#11 |
|
Toyota Car Club GT
Fecha de Ingreso: 05-June-2006
Ubicación: Yokohama Japan.
Mensajes: 22.727
Feedback Score: 29 reviews
|
Re: conversion a discos traseros en tercel
creo que sale en el mismo precio poner todo el eje del gt
y menos chance añljfañldfadf 
__________________
no se permite publicidad en las firmas. |
|
|
|
|
27-Jan-2009, 19:00
|
#12 | |
|
AE86 life
Fecha de Ingreso: 13-June-2008
Ubicación: guaremala city
kouki 86
Tiempo: to drift baby
Mensajes: 4.170
Feedback Score: 5 reviews
|
Re: conversion a discos traseros en tercel
Cita:
terceleros podriamos ponernos de acuerdo para hacer el upgrade a mi tambien me gustaria y que nos ayuden ahi los que ya lo han echo a ver quien nos echa la mano con las partes pilas puee hay me avisan
__________________
 
|
|
|
|
|
|
27-Jan-2009, 19:59
|
#13 | |
|
Senior Member
Fecha de Ingreso: 30-November-2007
Ubicación: Guatemala
tercel,trooper,corollag6
Tiempo: 13s
Mensajes: 172
Feedback Score: 1 reviews
|
Re: conversion a discos traseros en tercel
Cita:
|
|
|
|
|
|
27-Jan-2009, 22:48
|
#14 |
|
Toyota Car Club GT
Fecha de Ingreso: 05-June-2006
Ubicación: Yokohama Japan.
Mensajes: 22.727
Feedback Score: 29 reviews
|
Re: conversion a discos traseros en tercel
en urquilla vayan a preguntar
|
|
|
|
|
28-Jan-2009, 00:13
|
#15 | |
|
Senior Member
Fecha de Ingreso: 08-December-2008
Ubicación: Usa
magDraraVE
Tiempo: CharlesBoale
Mensajes: 2.401
Feedback Score: 40 reviews
|
Re: conversion a discos traseros en tercel
Cita:
La cosa es aprender algo poco a poco. |
|
|
|
|
|
28-Jan-2009, 15:11
|
#16 | |
|
Senior Member
Fecha de Ingreso: 10-December-2007
Ubicación: Ciudad de Guatemala
Toyota Tercel 97
Mensajes: 731
Feedback Score: 8 reviews
|
Re: conversion a discos traseros en tercel
Cita:
|
|
|
|
|
|
29-Jan-2009, 19:45
|
#17 | |
|
AE86 life
Fecha de Ingreso: 13-June-2008
Ubicación: guaremala city
kouki 86
Tiempo: to drift baby
Mensajes: 4.170
Feedback Score: 5 reviews
|
Re: conversion a discos traseros en tercel
Cita:
 pd. team tercel  sera sera |
|
|
|
|
|
29-Jan-2009, 19:46
|
#18 | |
|
AE86 life
Fecha de Ingreso: 13-June-2008
Ubicación: guaremala city
kouki 86
Tiempo: to drift baby
Mensajes: 4.170
Feedback Score: 5 reviews
|
Re: conversion a discos traseros en tercel
Cita:
|
|
|
|
|
|
29-Jan-2009, 19:54
|
#19 | |
|
Senior Member
Fecha de Ingreso: 30-November-2007
Ubicación: Guatemala
tercel,trooper,corollag6
Tiempo: 13s
Mensajes: 172
Feedback Score: 1 reviews
|
Re: conversion a discos traseros en tercel
Cita:
con mi tercel (modelo 92) el eje del starlet es mas angosto que el de mi tercel y mas largo tambien, entonces no solo es plug and play como fue con el cuadrante de paseo. pd. team tercel |
|
|
|
|
|
29-Jan-2009, 20:53
|
#20 | |
|
AE86 life
Fecha de Ingreso: 13-June-2008
Ubicación: guaremala city
kouki 86
Tiempo: to drift baby
Mensajes: 4.170
Feedback Score: 5 reviews
|
Re: conversion a discos traseros en tercel
Cita:
 ojala ojala asi mejoro el tercelinteam tercel asi mejoro el tercelinteam tercel no es mala idea no es mala idea habria que ver cuantos se apuntan habria que ver cuantos se apuntan media ves apoyen se puede hacer algo bueno media ves apoyen se puede hacer algo bueno |
|
|
|
|
|
29-Jan-2009, 23:06
|
#21 |
|
Fuck Off
Fecha de Ingreso: 28-March-2008
Mensajes: 8.246
Feedback Score: 9 reviews
|
Re: conversion a discos traseros en tercel
y que onda hoy no le dieron creditos por el buen thread que se hecho
 PD: Que de awevo tu Type R vos Carlos Fuck pudiente kadjaks
__________________
 |
|
|
|
|
29-Jan-2009, 23:22
|
#22 | ||
|
100% stock :D
Fecha de Ingreso: 12-October-2006
Silvia S14
Mensajes: 17.196
Feedback Score: 33 reviews
|
Re: conversion a discos traseros en tercel
Cita:
asñldjfdlasñjflñkdsajfñldaspero para el tuyo anda y pedi de un starlet gt o glanza y es plug and play, mi eje lo cambiamos con un cuate y tardamos como 1 hora y media yo me apunto a ayudar si quieren Cita:
|
||
|
|
|
|
29-Jan-2009, 23:41
|
#23 |
|
Senior Member
Fecha de Ingreso: 08-December-2008
Ubicación: Usa
magDraraVE
Tiempo: CharlesBoale
Mensajes: 2.401
Feedback Score: 40 reviews
|
Re: conversion a discos traseros en tercel
Y para el mio tambien sera de Plug and Play el mio es tercel 98 agencia.-
El unico problema esq tengo otras cositas q hacer como para ponerle en estos momentos el eje, pero mas adelannte primero Dios ya estoy mas tranquilo, pero de que se lo pongo se lo pongo. |
|
|
|
|
30-Jan-2009, 16:58
|
#25 |
|
Senior Member
Fecha de Ingreso: 13-June-2006
Mensajes: 355
Feedback Score: 0 reviews
|
Re: conversion a discos traseros en tercel
Yo iba a comprarle los discos a mi Starlet traseros pero se me atraveso un motor 1500 se lo compre y luego le pongo los discos, ya casi es proyecto el carrito
|
|
|
|
|
|
|