

|
|
|||||||
| Home | Forum | Registrarse | Mini-Banners  |
Miembros | Calendario | Marcar Foros Como Leídos |
| General Tech Foro para las preguntas técnicas sobre modificación de carros o problemas mecánicos en general (Ej. ¿Qué es el octanaje?). |
|
|

|
 |
 Este thread fue creado hace 6427 días. Lo mas probable es que el tema ya se haya resuelto y no necesite más discusión. Aunque si todavía crees que es necesario agregar un comentario, puedes hacerlo. Este thread fue creado hace 6427 días. Lo mas probable es que el tema ya se haya resuelto y no necesite más discusión. Aunque si todavía crees que es necesario agregar un comentario, puedes hacerlo.
|
|
|
Herramientas |
 14-Sep-2006, 00:24
|
#1 |
|
Senior Member
Fecha de Ingreso: 06-June-2006
Ubicación: Ciudad de las Palmeras, Escuintla
Honda Civic EX 94
Mensajes: 821
Feedback Score: 0 reviews
|
Como Pintar Interiores De Un Vehiculo
 by Jon Mikelonis Foreword If you're a Do-it-Yourselfer like me, then you've acknowledged the fact that some jobs are better left for the experts. No matter how proud you may be or how badly you want to make a personal stand against shows like Unique Whips and Overhaulin', sometimes you need to summon the help of a professional in order for an upgrade to be done right. In the case of engine building this doesn't mean you need to run out and order a crate motor. What it means is that it's OK to have an experienced tradesmen port your cylinder heads while you make the component selection, take the proper measurements, and assemble your own motor. In the case of interior restoration it means it's OK to work with an upholsterer while you remove the old interior, choose the new fabrics, install the carpet, design the bucket seat brackets, dye the seat belts, paint the door panels, and assemble the whole thing. In this fifth installment of Project MX, I'll be demonstrating the creative methods I used to freshen up the interior of FordMuscle's 1972 Mercury Montego. Although I do not claim to be a worthwhile candidate to work in Will Castro's shop on Unique Whips, I do claim to be an dedicated hands-on Ford enthusiast who is determined to do as much work on his own car as possible. So, while Will and the like perform their magic for an A-List of of "important" clients from Hollywood and professional sports, you and I will continue to work for an A-List of clients that include ourselves and the one's identical with us. Let's get started in this two part series of DIY interior design. Teardown Heck, if Chris Jacobs from Overhaulin' can teardown an interior then so can you and I. We've all seen interiors like this before, mold ridden carpets, multiple tones of stink, and mistmatched Pick N' Pull replacement parts. 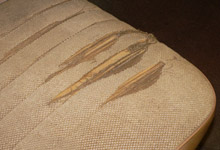  Besides being from a car other than the Mercury Montego, the front bench seat was collapsed and torn. Besides being from a car other than the Mercury Montego, the front bench seat was collapsed and torn.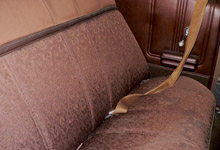  Inspired from George Washington's Mt. Vernon Estate, the pasely rear seat upholstery was formal enough to entertain lords. I had to get rid of it. Inspired from George Washington's Mt. Vernon Estate, the pasely rear seat upholstery was formal enough to entertain lords. I had to get rid of it. 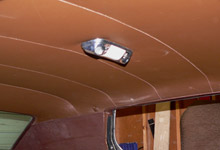  The headliner was in suprisingly good shape considering the rest of the interior. A keeper in my book. The headliner was in suprisingly good shape considering the rest of the interior. A keeper in my book.  I wasted no time and removed the primary source of passenger repellant. I wasted no time and removed the primary source of passenger repellant. 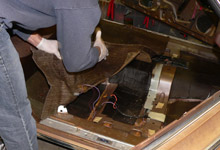  No goodies under the stock carpet. I've grown accustomed to finding some relic during these digs. Nothing this time around. No goodies under the stock carpet. I've grown accustomed to finding some relic during these digs. Nothing this time around.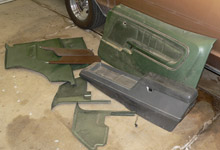  Ebay and Pick N' Pull yielded some green molded plastic door panels, visors, kick panels, and a center console made for a column shifted Ford intermediate. All but the visors needed color treatment for a uniform look.Plastic and Vinyl Painting with SEM Flexible Coatings Ebay and Pick N' Pull yielded some green molded plastic door panels, visors, kick panels, and a center console made for a column shifted Ford intermediate. All but the visors needed color treatment for a uniform look.Plastic and Vinyl Painting with SEM Flexible CoatingsFordMuscle readers advised me about SEM Products Inc. for rigid plastics and vinyl when I needed a method for changing the color of the interior parts for Project MX. SEM flexible coatings can be found online at the Eastwood Company (2) Plastic Front Door Panels (2) Plastic Rear Door Panels (2) Plastic Kick Panels (1) Plastic Center Console (1) Vinyl Console Pad (2) Vinyl Armrests (Front Door Panels) (2) Vinyl Armrests (Rear Door Panels) If you're sketpical about painting interior parts, let me show you how the SEM flexible coating system is different from the can of Krylon Vinyl Paint you find at the chain store. Here, I'll demonstrate on just a few of the pieces we needed to coat. 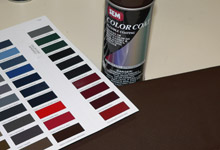 Local Auto Body Shop Suppliers typically carry a rack on the floor of SEM Color Coat aerosols. The display includes a color chart as well. I compared the chart to the dark brown visors to determine that "Cordovan Brown" was the best match. Local Auto Body Shop Suppliers typically carry a rack on the floor of SEM Color Coat aerosols. The display includes a color chart as well. I compared the chart to the dark brown visors to determine that "Cordovan Brown" was the best match.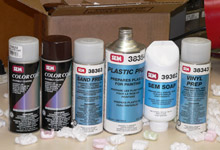 To do the job right and rise above cheap vinyl paints, SEM offers a complete system for changing the color of plastic and vinyl. The prep products serve to remove contaminants and promote adhesion. To do the job right and rise above cheap vinyl paints, SEM offers a complete system for changing the color of plastic and vinyl. The prep products serve to remove contaminants and promote adhesion. 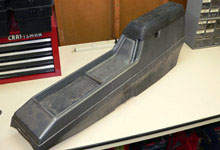 I got started with the center console. Texture, age, and cigarette ash build-up meant the console needed a thorough cleaning. I got started with the center console. Texture, age, and cigarette ash build-up meant the console needed a thorough cleaning. 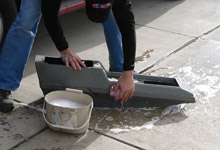 Before I started cleaning with the specialized SEM Soap, I wiped off the sludge with warm soapy water. Before I started cleaning with the specialized SEM Soap, I wiped off the sludge with warm soapy water. 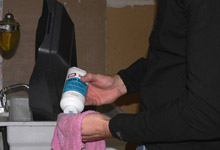 Once the bulk of the dirt was removed, I began cleaning with SEM Soap (PN 39362). Once the bulk of the dirt was removed, I began cleaning with SEM Soap (PN 39362). 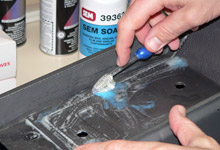 Since the console was textured, I took a tooth brush to areas that appeared to be sheltering 30 year old toe jam. Since the console was textured, I took a tooth brush to areas that appeared to be sheltering 30 year old toe jam. 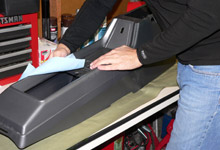  Once the console was clean, it was time to rinse and dry. Once the console was clean, it was time to rinse and dry. 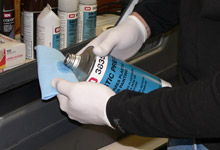  SEM Plastic Prep SEM Plastic Prep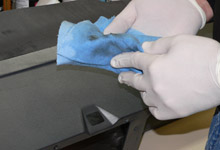  This picture shows that even after washing the console with detergent and SEM Soap, there is still some grime left to be removed with the Plastic Prep. This picture shows that even after washing the console with detergent and SEM Soap, there is still some grime left to be removed with the Plastic Prep. 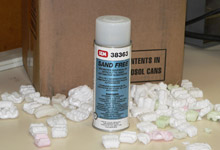  SEM Sand Free Primer SEM Sand Free Primer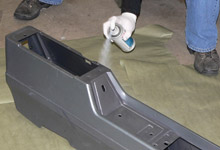  In a well ventilated area and while wearing a mask I applied one coat of Sand Free. In a well ventilated area and while wearing a mask I applied one coat of Sand Free.   SEM recommends applying your color while the Sand Free is still wet. They also suggest the first coat of SEM Color Coat Aerosol SEM recommends applying your color while the Sand Free is still wet. They also suggest the first coat of SEM Color Coat Aerosol 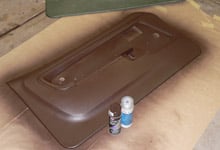  I did the same process on all the door panels. This door panel required 1 whole can of the Cordovan Brown Color Coat. I did the same process on all the door panels. This door panel required 1 whole can of the Cordovan Brown Color Coat. 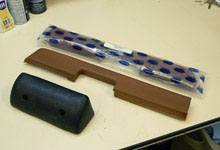  Dearborn Classics supplied new front door panel armrests. The black rear armrests were from an Ebay deal. All pieces received the SEM Cordovan Brown treatement. In this case however, I used the SEM Vinyl Prep Dearborn Classics supplied new front door panel armrests. The black rear armrests were from an Ebay deal. All pieces received the SEM Cordovan Brown treatement. In this case however, I used the SEM Vinyl Prep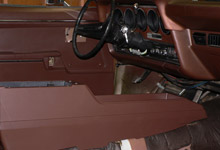  After three hours and once the painted pieces were dry, I gently hung the door panels and set the console in place. I was pleased with the color match to the untreated and original dash. After three hours and once the painted pieces were dry, I gently hung the door panels and set the console in place. I was pleased with the color match to the untreated and original dash. |

|

|
| Sponsored Links |
||||||
|
|
14-Sep-2006, 00:25
|
#2 |
|
Senior Member
Fecha de Ingreso: 06-June-2006
Ubicación: Ciudad de las Palmeras, Escuintla
Honda Civic EX 94
Mensajes: 821
Feedback Score: 0 reviews
|
Segunda Parte
Resourcing Upholstery
The fact that restomods are fetching nearly the same cash as pure restorations these days made it easy to try something unique with the Montego's upholstery. To replace the bench seat, I opted for some used Bestop Jeep seats in good condition which I'll reveal on the next page. This left only the rear seat and door panel inserts in need of upholstery. I envisioned a two-tone interior using the dark brown I showed you in the previous section for the molded plastic pieces and a factory original "Ginger" for the vinyl sections. Dearborn Classics offers full seat upholstery for the Mercury Montego, however I ordered just the rear seat portion. To match the door panel inserts to the new rear seat upholstery I was left to my own devices, a small but worthy DIY challenge. 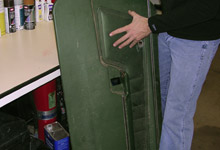 I had already pulled the door panel inserts prior to color coating with SEM. I had already pulled the door panel inserts prior to color coating with SEM.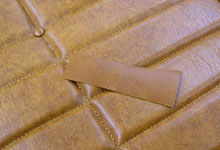 Before trying to locate the right material to cover the door panel inserts, I waited for the rear seat upholstery to come in from Dearborn Classics so I could make a proper color and texture match. Before trying to locate the right material to cover the door panel inserts, I waited for the rear seat upholstery to come in from Dearborn Classics so I could make a proper color and texture match.  Not every town will have a fabric shop like this one. However, my home town (Reno, Nevada) has a good number of specialty stores that are gold for DIY'ers liek me. Not every town will have a fabric shop like this one. However, my home town (Reno, Nevada) has a good number of specialty stores that are gold for DIY'ers liek me. 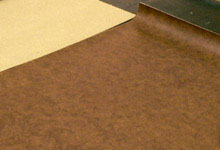 Mill End Fabrics had just the material I needed. One square yard was only 15 bucks and the texture was a perfect match. Mill End Fabrics had just the material I needed. One square yard was only 15 bucks and the texture was a perfect match. 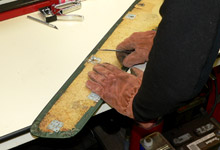 Since I chose to re-use the original insert backing material, I was Since I chose to re-use the original insert backing material, I wascareful to remove each staple retaining the original vinyl very carefully. Once the staples were all removed, the stock green vinyl came off easily. 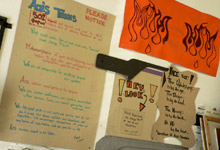 Upholstery shops come in all shapes and sizes. I tend to search for Upholstery shops come in all shapes and sizes. I tend to search forsmaller service providers when outsourcing a job. Most big shops don't want to deal with a DIY'er who asks them to take a job to 70% completion in exchange for a price break. A local shop in my area, Ace's Upholstery, was willing to work with me as long as I honored "Ace's Terms". 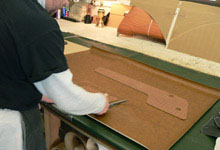 Troy from Ace's Upholstery cut me a deal since I supplied the vinyl and was willing to take care of fastening the finished upholstery. Troy from Ace's Upholstery cut me a deal since I supplied the vinyl and was willing to take care of fastening the finished upholstery.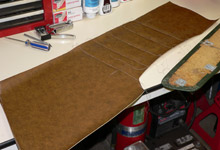 For $30 a piece, this is what I came back to the garage with to cover the door panel inserts. For $30 a piece, this is what I came back to the garage with to cover the door panel inserts.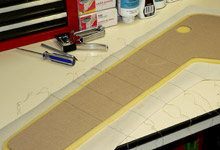 This is a shot of the underside of the cover, the cardboard shown here This is a shot of the underside of the cover, the cardboard shown hereprovides something for the upholsterer to stitch the vinyl to and is not used in place of the backing material. 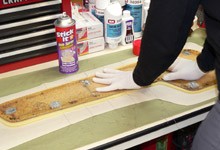 With a specialized spray adhesive called "Stick It", I attached the With a specialized spray adhesive called "Stick It", I attached there-used backing material to backside of the new cover. 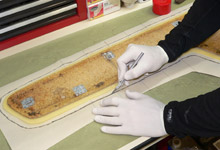 The upholsterer used a generous amount of material so I needed to trim it down before I could staple it down. The upholsterer used a generous amount of material so I needed to trim it down before I could staple it down. 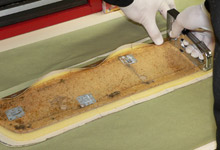 Once trimmed, I pulled the material tight and stapled it at various points around the perimeter of the backing material. The only tricky spot was around the corners. For my first time doing this, I just took a look at how the factory did it. By making small tirangular cut-outs I was able to persuade the vinyl into making smooth turns. Once trimmed, I pulled the material tight and stapled it at various points around the perimeter of the backing material. The only tricky spot was around the corners. For my first time doing this, I just took a look at how the factory did it. By making small tirangular cut-outs I was able to persuade the vinyl into making smooth turns. After stapling and re-stapling a few times, the insert was ready to be After stapling and re-stapling a few times, the insert was ready to bemocked up in the Montego.  Troy at Ace's Upholstery offered such a great rate and quick turnaround that I had him cover the rear seat with the upholstery I ordered from Dearborn Classics. Troy at Ace's Upholstery offered such a great rate and quick turnaround that I had him cover the rear seat with the upholstery I ordered from Dearborn Classics. 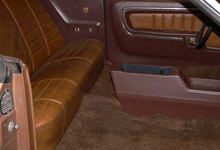  Anxious to see how well my concept matched, I mocked-up what I had completed so far. By attaching the insert, gently hanging the panels, and sliding the rear seat in place, I was able to catch a glimpse of the final interior. The carpet shown here was also temporarily mocked-up. Like the seat upholstery, I sourced the carpet from Dearborn Classics. Anxious to see how well my concept matched, I mocked-up what I had completed so far. By attaching the insert, gently hanging the panels, and sliding the rear seat in place, I was able to catch a glimpse of the final interior. The carpet shown here was also temporarily mocked-up. Like the seat upholstery, I sourced the carpet from Dearborn Classics. |
|
|
|
|
14-Sep-2006, 06:55
|
#3 |
|
ku klux kan TEAM
Fecha de Ingreso: 05-June-2006
Mensajes: 5.508
Feedback Score: 56 reviews
|
buena info

__________________
 
|
|
|
|
|
14-Sep-2006, 07:36
|
#4 |
|
Anarquista
Fecha de Ingreso: 05-June-2006
Ubicación: La Florida
Mensajes: 36.031
Feedback Score: 49 reviews
|
 Excelente aporte vos!!!!
__________________
 Quiero una mi e-bike!!!
 |
|
|
|
|
14-Sep-2006, 08:40
|
#5 |
|
GOT BOOST
Fecha de Ingreso: 21-July-2006
Glanza V
Mensajes: 2.793
Feedback Score: 23 reviews
|
buenisimos tips viejo
__________________

|
|
|
|
|
| Herramientas | |
|
|


